Before
After
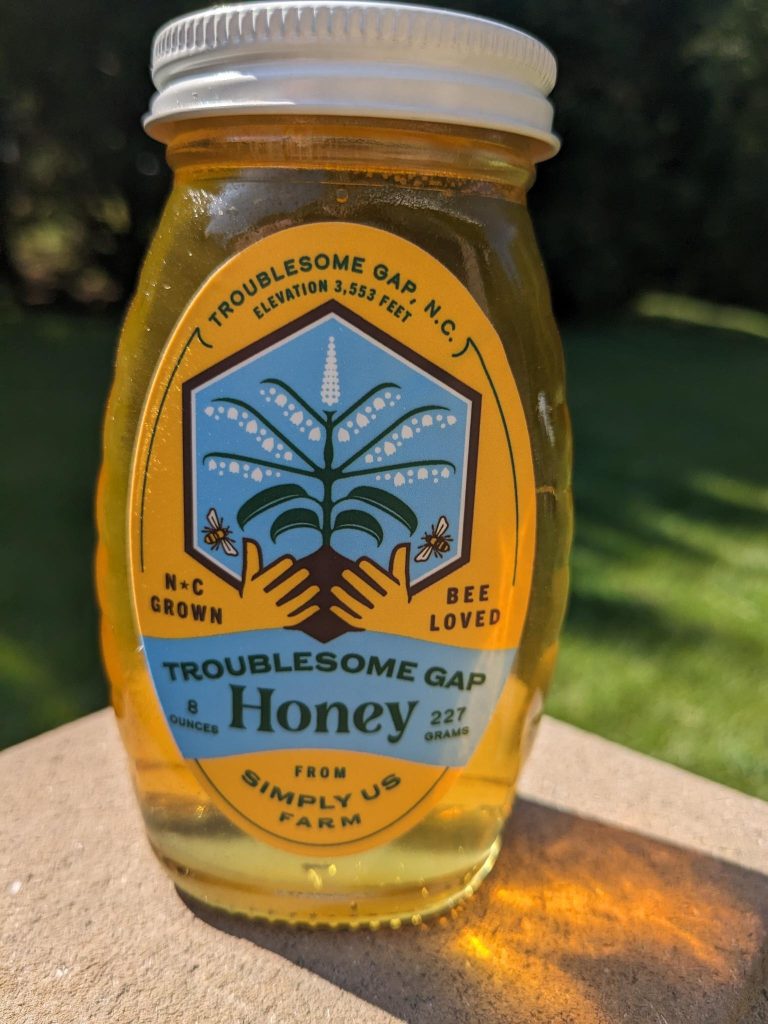
Camp in the Gap!
Before
After
Let’s talk about dinner, the crown jewel of the meals while camping. We’ve already discussed breakfast, and though bacon is amazing it takes time and effort you may not have in the morning. Dinner, however, is usually the occasion where you can take more time.
First night.
Let’s take a typical four-day camping trip where you leave after work on, say, a Friday. By the time you arrive at the camp ground it’s seven or eight-o-clock. You need to pitch your tent before anyone can climb into bed. That first night is probably not the best time to cook a big dinner. I recommend either keeping it simple by eating some type of cold meal, or something you picked up along the way, or do what Connie and I do—eat out, or pick up food on the way and eat when you arrived at the campsite. When you first start camping, do things as simple as possible to make everyone happy. Your goal is to enjoy this time spent together.
Building a fire on the first night is a possibility, though it depends on your skill set. Don’t feel obligated to build a fire. You could just eat and go to bed, depending on how tired you are or what you did during the day. It may be dependent on your arrival time.
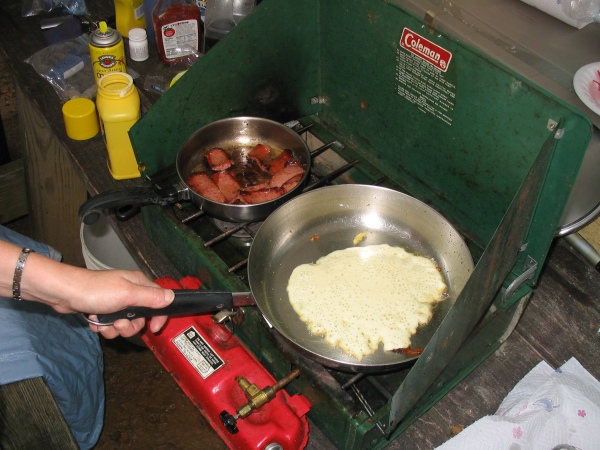
Stove options.
There’s the backpacking stove, which commonly use butane gas. They are small, usually one burner, and provide a limited amount of heat.
Another option is a Coleman stove, those big, green things last forever. I fixed one of them with a pocket knife and a Q-tip once. So, they’re bulletproof, they’re wonderful. They run off white gas, which you can purchase at Walmart and is inexpensive. Though it is very flammable so handle carefully. Always make sure to keep any open containers of white gas away from source of ignition such as open flames, running cars or even electronics like your phone.
You can also find one or two burner stoves that either run off propane or a butane mix. I recommend two burners even though it takes up more space transporting because you can do two things at once. For example, cook you meat at the same time as the vegetables, or perhaps warm up water while you cook your meal.
The downside to a Coleman stove is you don’t get the smoky taste from the fire or charcoal. On the other hand, even though there is no smoky flavor, everything tastes better in the woods!
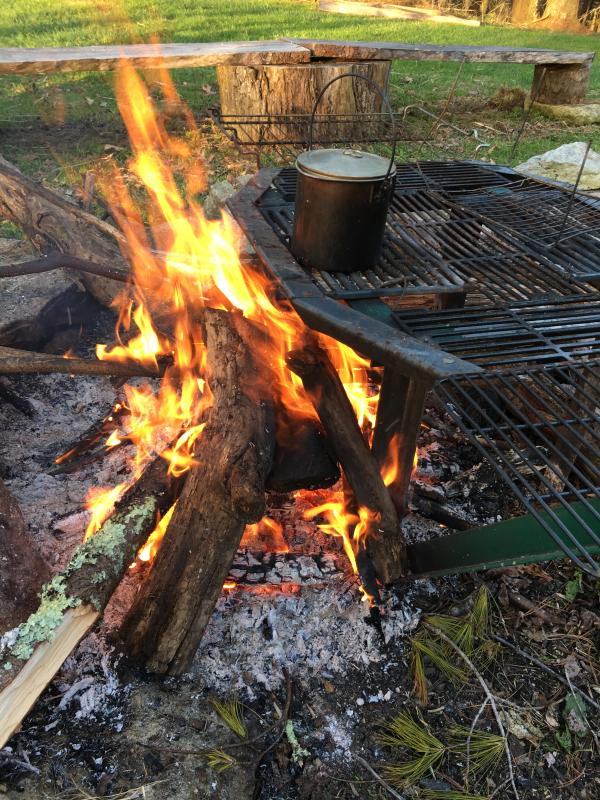
Cooking over a campfire.
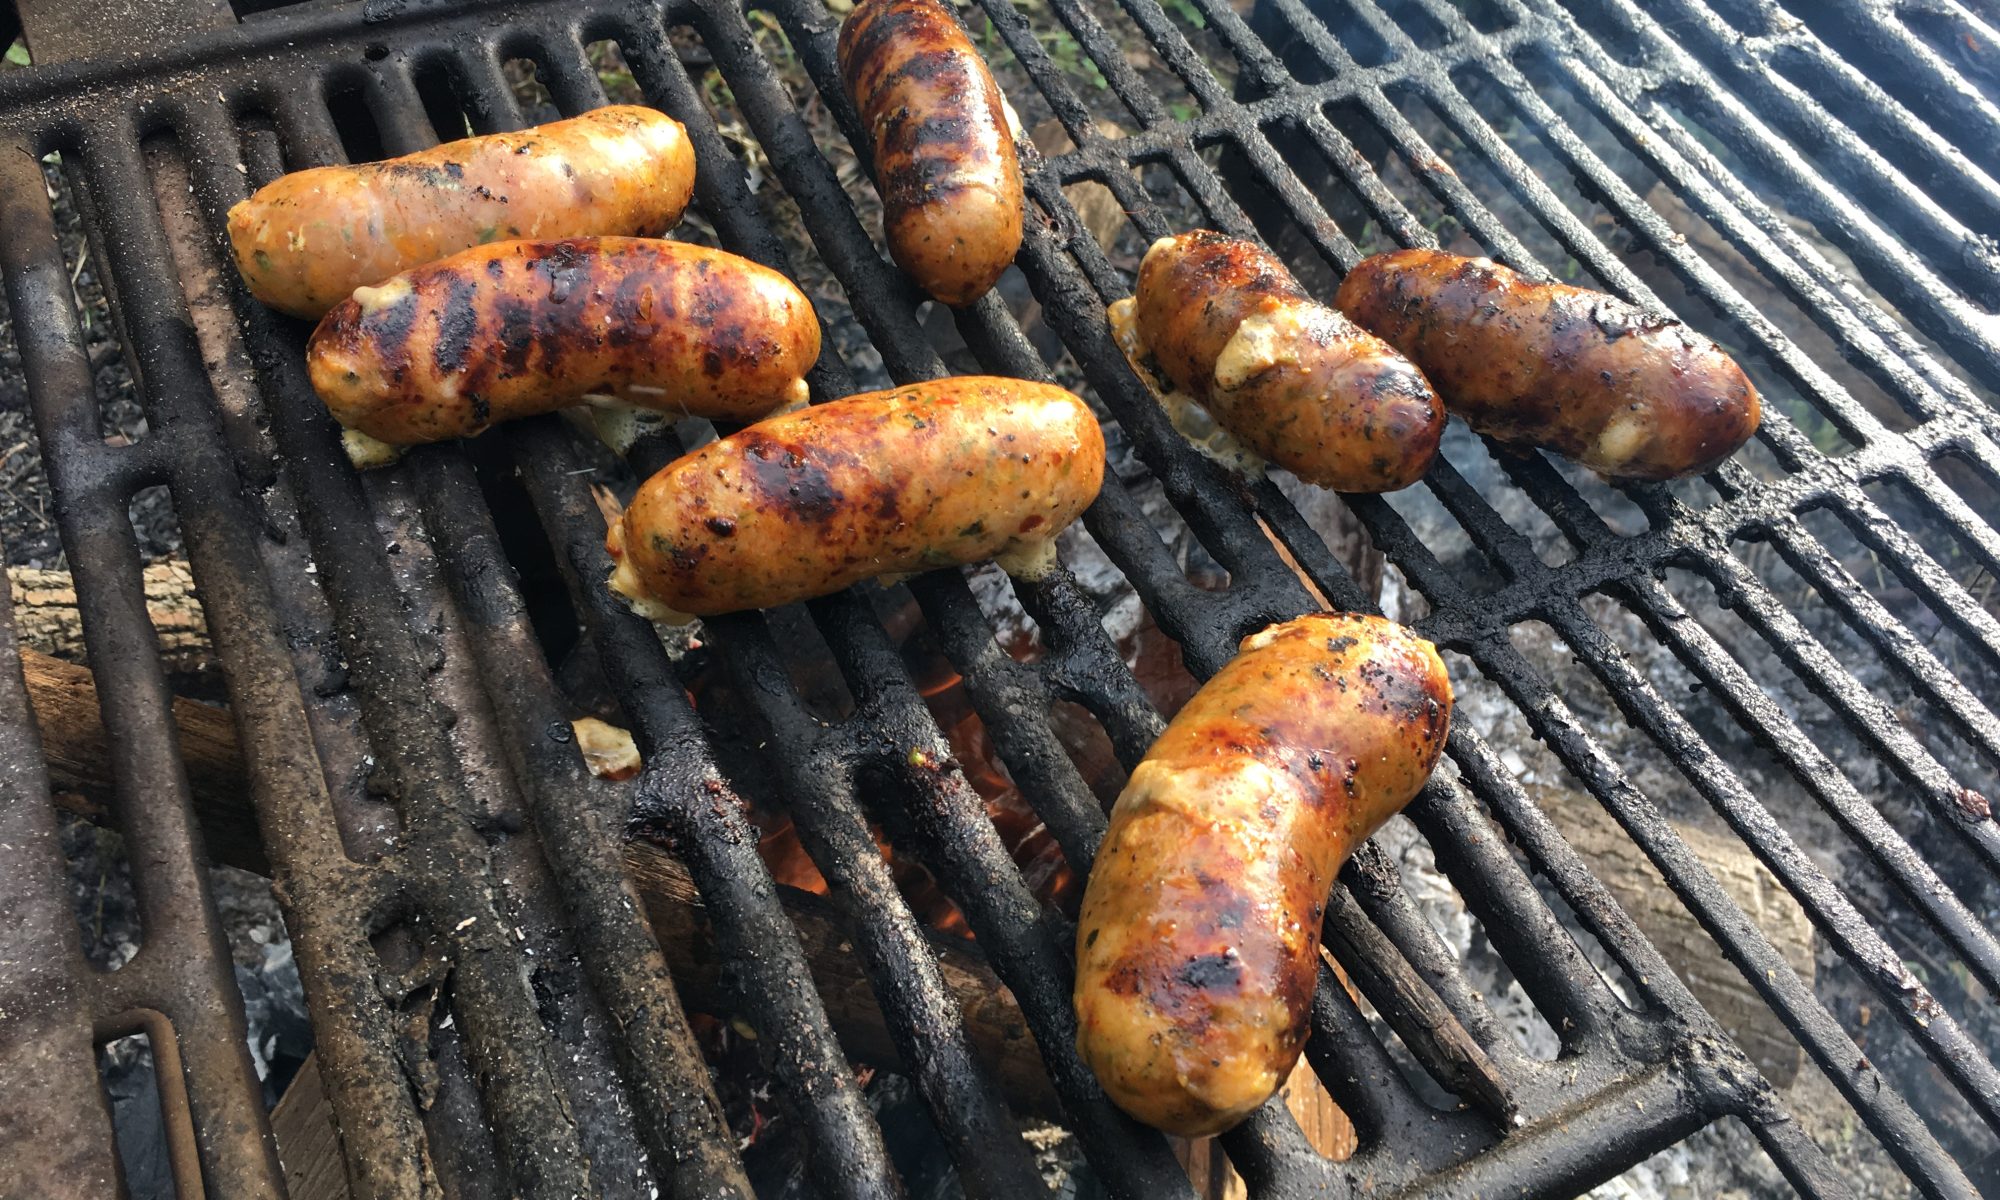
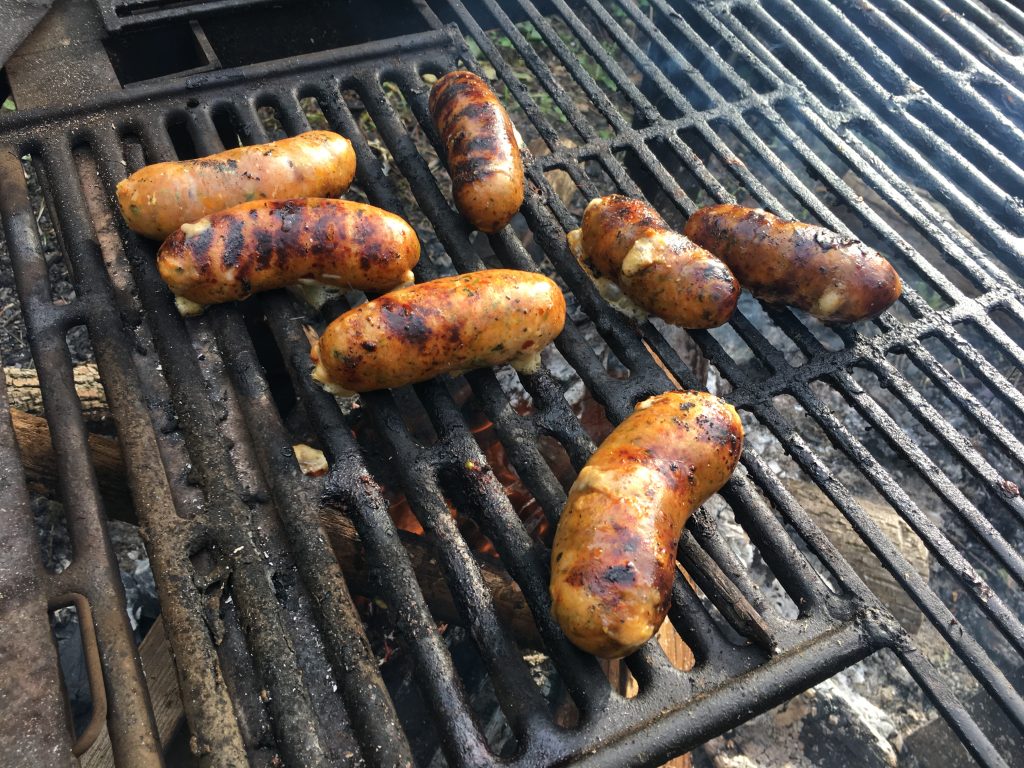
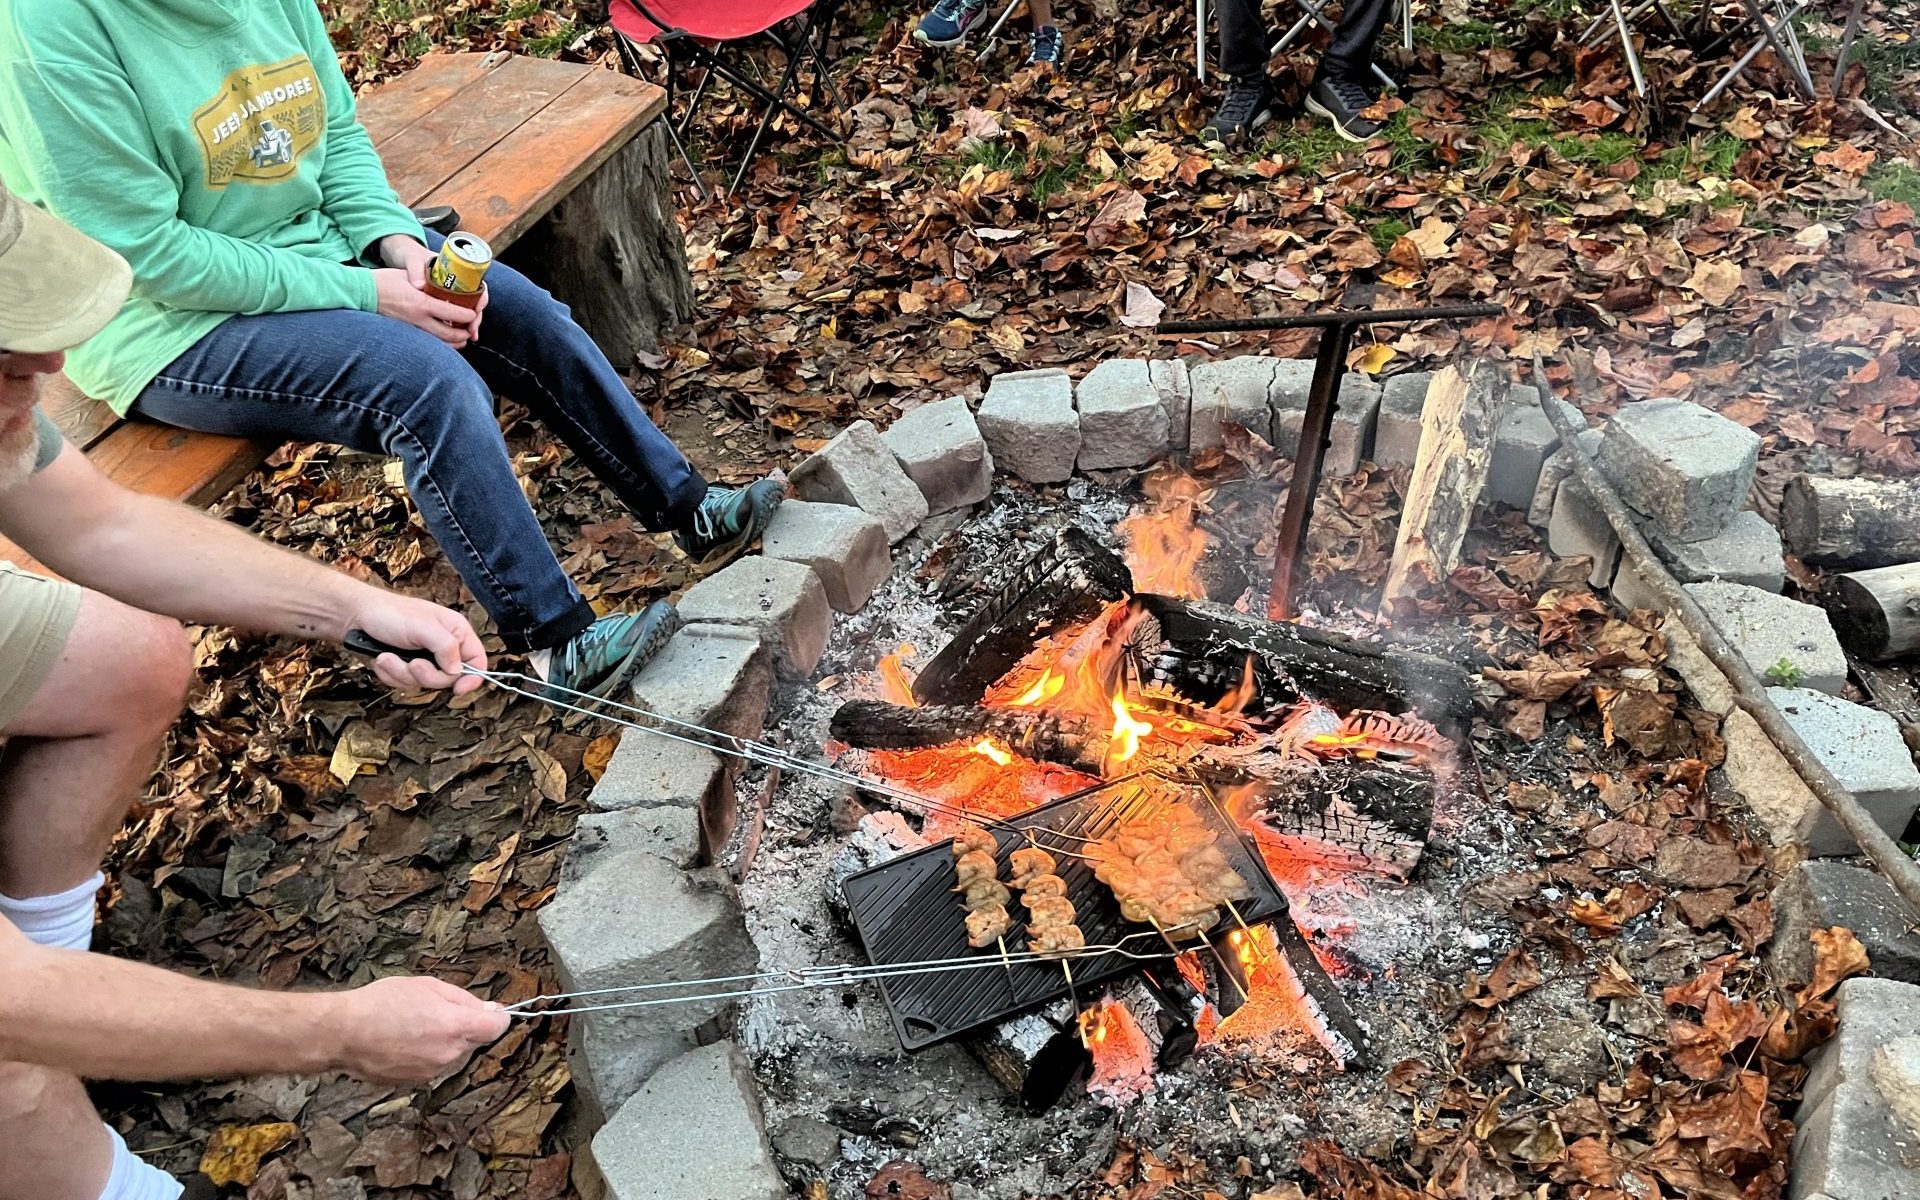
I love cooking over the fire. Though I’ll admit, I’ve manned dinner over an open flame a lot and made my share of mistakes. Three years ago, my wife put a week of effort into making gourmet baked beans with hotdogs marinated in. At the campsite I heated them over the fire for about two hours, stirring them to make sure they didn’t stick. They smelled delicious, and each time I tasted them my stomach rumbled for more. As I pulled the pot off, I’ll be doggoned if I didn’t drop it! The pot fell to the side and we lost half the meal. Though it did make for a funny story the next year.
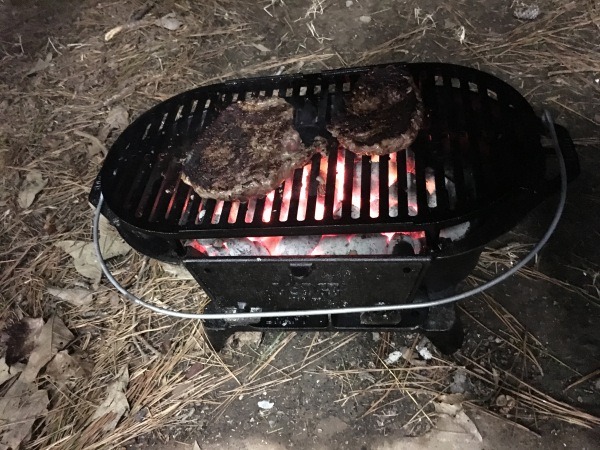
Or a charcoal grill.
When cooking over a fire you need a grate to sit your pot or pan on, or perhaps you’ve built something out of rocks. In my situation I had a grate so I had no excuse. Some campsites will have grates over the fireplace. Generally, that’s not the case. You can purchase a grate and bring it with you so you have a flat surface for pots and pans—you can even cook food directly on top of a clean grate.
Many paid campsites will have a charcoal grill. Charcoal is easy and consistent. Once lit, it’s pretty much trouble-free. The food tastes good. The key with charcoal is to leave ample time to light the coals and get it hot before cooking. Don’t forget to put on a pot of water as soon as you take the food off so you can wash and rinse your dishes and utensils. I usually take the water and split it into a container for washing and one for rinsing.
The down side with charcoal is that you don’t have a fire to sit by afterwards. However, at some campsites it may be inconvenient or not possible to have a roaring fire. If you do want a campfire, you need to make sure you have wood. As some campsites and national or state forests don’t allow campfires, make sure you can have one where you’re going.
Plan when to start dinner.
There needs to be thought put into when to start a fire or charcoal burning so you’ll be ready to cook dinner, so keep that in the back of your mind as you enjoy your day. Perhaps 4 or 4:30 p.m. you may return to the site and begin building a fire or ignite the stove or start the charcoal burning.
If you’re using charcoal, you need to start thirty minutes ahead of time to get the coals to the point of cooking heat. I start with the lighter fluid and soak the briquettes for ten to fifteen minutes, then light them. Also, I have a rapid fire chimney starter that helps light the charcoal quicker. They work great and are inexpensive at places like Walmart or Home Depot. Don’t forget that with charcoal, there’s going to be a peak time where they stay hot, and then you’ll need to add more coals if you want to heat water or cook something else. Charcoal definitely needs management.
A campfire will take about thirty minutes to an hour, depending on temperature, humidity, dryness of wood, and how aggressive you are about adding additional logs. The fire needs to burn long and hot enough so you are getting red-hot coals beneath. Once you have a roaring bed of coals, you’re ready to cook. As you go through this process, keep in mind that you’re going to have to use branches about your forearm size or maybe smaller, perhaps moving up to biceps size once the coals start rapidly dropping. The way to get frustrated is to throw a foot-wide log or green wood onto it. We’ll talk more about building a successful campfire in a later chapter. For a quick fire that gets hot fast, use dense wood like poplar. Leave yourself ample time and have plenty of dry wood on hand.
Campfires aren’t always successful, so have a backup plan. If you don’t have the skill to master a roaring fire, or if the wood is green, or it rained during the day and the dry wood you brought is now wet, or you planned on finding kindling to start the fire but it’s either now dark or there was a rain earlier in the day or something else you didn’t expect, a backup plan is essential.
Start water warming for cleanup.
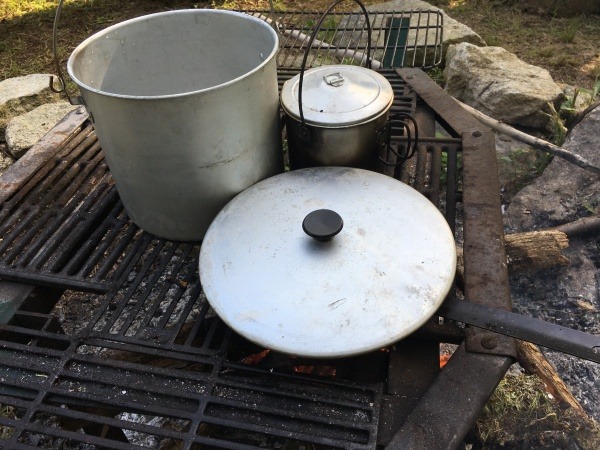
Plan for cleanup before you even begin cooking. Once the fire is going, get your big pot and start warming the water. The pot should be about twelve inches in diameter and about a foot tall. So, the whole time you’re cooking you’re also warming your water. That way, after you’re done eating, then you can immediately wash dishes. You don’t have to wait thirty minutes for hot water and during that time everybody loses interest in cleaning up. Another win-win.
Dutch oven cooking.
A Dutch oven is a giant cast-iron pot with a lid. It’s a great way to cook a lot of things at the same time, either over charcoal or a camp fire, and there are tons of recipes you can find on-line. I’ll say a Dutch oven takes a little bit of practice, not a huge amount, but, you might want to steer clear for your first few camping trips. It’s a little different to manage than just throwing bacon or ham in a pan, or hamburgers on a grill. The flip side is the foods you can make in a Dutch oven are savory and worth the effort!
Our favorite dinner foods while camping.
I recommend anything easy to transport and fairly simple to make.
My wife, Connie, is known for her beanie weenies. Everyone raves about them and they are spectacular! She starts days ahead and lets them marinate in their own juices—hot dogs, onions, beans, brown sugar, and Worcestershire sauce. Over your campfire, start it before everything else because it cooks slowly, about forty-five minutes or until you achieve the consistency you want. Cook the beanie weenies too long and you’ll have paste, not beans. Either way, the taste is awesome.
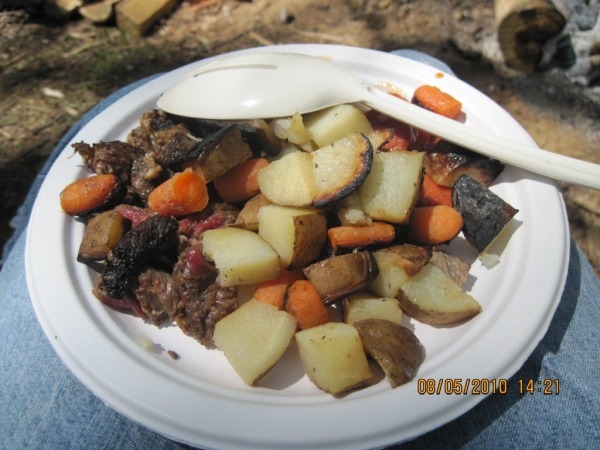
We also have had success with Hobo Meals, where you place cut up steak or a formed hamburger, along with carrots, potatoes, onions, then wrap all the food in a tin foil pouch, use heavy duty foil and consider double wrapping as you’ll be flipping the pouch over and over as it cooks. You can add butter or oil and some seasoning depending on your taste. Now, based on how long you want to cook these and how you want your meat to come out, you may need to blanch the potatoes ahead of time, or perhaps cut them into smaller pieces. I have a friend who had Hobo Meals as a child and her mother used canned potatoes, that way everything would cook evenly. Do whatever works for you. When we make them, we store them in Ziploc bags, because anything you put in the cooler may end up underwater, so you want to keep everything as water-resistant as possible. Also, you’re not spreading the juices from uncooked meat into everything else in the cooler. So, the hobo meals are easy. You throw them on the fire in a fairly warm spot, and then you wait. Forty-five minutes later, you have dinner. Open those up and you’ve got this nice mixture.
Anything that needs to be sliced or diced, can be done ahead of time at home. Even cutting a carrot at a campsite is a pain. It’s also quicker because you don’t have that prep time. The goal at the campsite is to get the fire going where you’re getting ready to cook, and at the same time everybody can watch the flames and enjoy the variety of smells.
We also make Biscuit-on-a-Stick. You’ll need precooked sausage, a marshmallow stick, and a croissant or biscuit (think those Pillsbury triangle croissants that haven’t been cooked yet). Warm the meat over the fire, then wrap the sausage up with the croissant, put it on the end of the stick, and then cook over the flame. Out in the wild freshly baked bread is quite a treat.
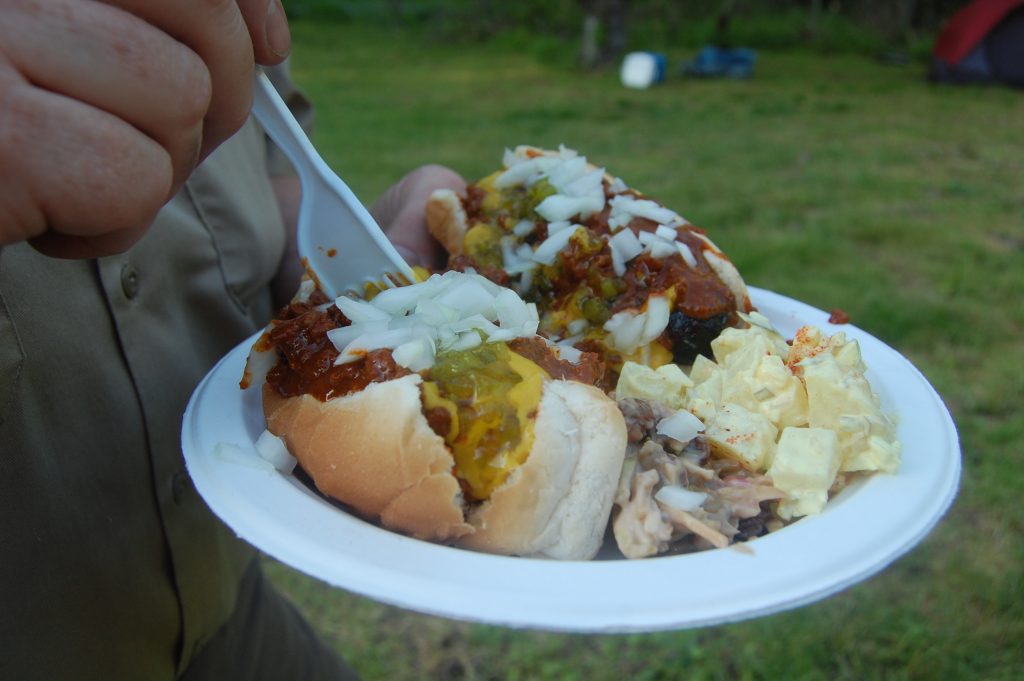
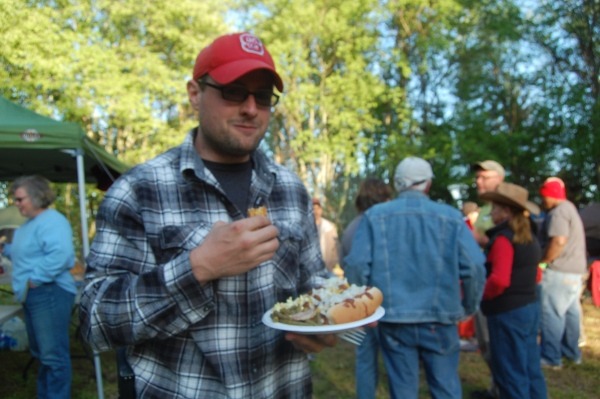
Burgers are good over the fire, don’t forget the cheese if you like that. Hot dogs and Italian sausages can be cooked with a stick. Chicken can be good, I recommend preparing and marinating ahead of time. Same thing with beef. Just about any meat you can put on a grill usually works really well over a campfire.
Keep in mind that if you have a grate sitting over the fire, you can toast bread as well as hamburger and hotdog rolls.
Side note about cook sets.
Connie and I bought a whole cook set from Nesco American Harvest which included pots, pans, a sauce pot, plates, and cups. All the pieces stack into this one pot with a lid, and the lid’s actually frying pan so it’s a great way to transport stuff.
Stay sanitary.
Another important thing is to set up your camp kitchen area in such a way that’s easy for you to wash your hands. Because if someone in your group gets food poisoning, y’all will never go camping again! Being sick out in the woods is rough, I know from personal experience. Before you do anything cooking-wise, wash your hands with soap and water. Using the alcohol-based hand sanitizer is not washing your hands, all it does is clean off the outside layer. Say you have dirt on your hands, the sanitizer is not going to remove that. Soap and water is the way to go.
Every time you handle raw meat, you want to make sure you wash your hands really well. Especially because you may be using colder water, which is less effective. So, wash your hands, wash your hands, and keep washing them. It will protect you and everybody else.
Use paper plates.
Instead of plastic plates that need to be washed, consider paper. You can burn them in the camp fire. I’d avoid foam or disposable plastic because when those burn they put off nasty gases. Whereas paper plates, they burn easily. You can carry the unused ones home without difficulty. But do note that even though paper’s biodegradable, don’t leave a mess. Whatever you bring in, bring out with you. Leave your campsite in better shape than when you arrived.
You may want to save the earth. I will make the argument that this is a camping trip and may be a good time to make an exception from saving the earth in that you’re really not talking about a huge amount of volume of plastic, if you use the plastic forks and knives.
S’mores.
What’s a campfire without S’mores? They are the ultimate camping dessert. A S’more, just in case you don’t know, consists of a chocolate bar and a toasted marshmallow between two halves of a graham cracker. Toast the marshmallow over the fire, hot to the point they’re about to fall off the stick, and then you put it on top of the chocolate, and between the graham crackers like a sandwich. Squish them together; the marshmallow melts the chocolate, squishes out the side and you have something really good.
You can either find long sticks for roasting or there are metal marshmallow sticks you can purchase.
Cleanup.
So, when it comes to cleanup, clean up quickly.
Enjoy your time after dinner around the campfire.
Bring comfortable chairs for everyone to sit in. These days, awesome camping chairs are available for purchase just about anywhere. A lot of them aren’t that expensive. Of course, you can sit on a rock if you want to; that’s just fine. Or if you want to be a little more cozy, buy a nice big chair that you can lay back in, prop your feet up, and get comfortable. Sometimes the best conversations occur over the flickering of a campfire. Maybe because everyone is so relaxed and out of their natural element, but just sitting by a roaring fire is amazingly relaxing.
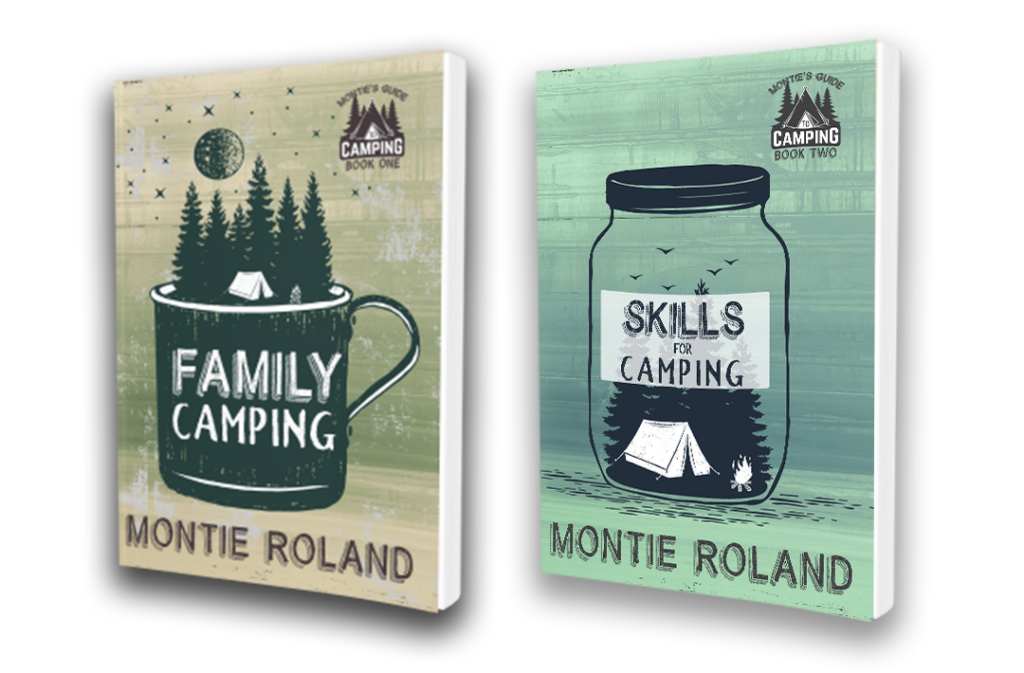
Check out my books on camping
Let’s talk about lunch, and go through a few options that work in a campsite setting. We’ll also discuss ways to prepare the noon-time meal ahead of time and eat on-the-go.
How to fit in a healthy lunch amid activities.
You’re probably going to be busy doing things during the day. Optionally, if your whole day consists of sitting by the campsite and reading or hanging out, then most likely you’ll build a fire at breakfast and keep it going minimally all day, and then cook for lunch. Or perhaps you have someone who loves to prepare food over the fire, and will cook lunch. But if that isn’t your situation, read on.
Lunch is usually something that can be put together quickly. That means it is cold so you don’t need to tend a fire or cook. For us, sandwiches are one of our go-to’s. A really easy sandwich is peanut butter and jelly—it is quick and requires very little cleanup. Another option is a cold cut sandwich. Pick your favorite refrigerated meat and or cheese, and it can keep in the cooler. Another alternative is to use canned or packaged meats or spreads. They don’t require refrigeration until opened. You may need mayonnaise or mustard. One trick with condiments is to get the squeeze bottle so you don’t need a knife. Another condiment choice is to use the single serving packets, which don’t require refrigeration.
One thing Connie does is slice tomato and onion at the house and package it up, so we have a vegetable option to add to our cold cut sandwiches. If you have access to a cooler, you could bring a Tupperware container of tuna, chicken, or egg salad to make a simple sandwich.
Pre-made lunches.
You can make lunch at home or pick up premade meals at the grocery store before leaving for camp. Alternatively, you could pick up a lunch in the morning on your way to a hike. Throw them in your cooler and your good to go. We hunt down hole-in-the-wall sandwich shops and grab specialty sandwiches in the morning, then enjoy them at lunchtime. The neat thing about places like this is they also offer pre-made basic box lunches.
Leftovers or store-bought.
Don’t forget, leftover pizza is tasty cold. Something like Bojangles fried chicken is superb cold. Think about things your family will like and won’t mind cold or at least not heated up. The trick with lunch is speed in preparation. You may sit down for a few minutes to enjoy the meal, but then you’re going to be on the go again. So, don’t get tied up mid-day with some elaborate event, unless that’s your choice.
Building your lunch.
Think about your main course at lunch, perhaps a sandwich or a piece of leftover chicken. Then you’ll want something on the side, maybe chips, pretzels, sweet potato chips, sesame sticks, kale chips. Or perhaps you’ll opt for an apple, orange, banana, or kiwi. There’s a wide range of options here, from healthy to not so much. One thing to consider is how healthy your family eats, camping might be an appropriate time to add those potato chips on the trail as a treat.
Lunch is usually in the middle of activities, so eat on the go.
Because lunch is mid-day, it lands smack dab in the middle of whatever activities you’re doing. Many times you don’t want to interrupt those activities, you want to enjoy them. Those are the days when eating on the go works best.
Perhaps you choose to pack your lunch in the morning at the campsite and put it in your bag. You can either eat as you hike or sit down on a rock or an overlook to enjoy the meal. That’s a great way to have a nice, peaceful meal appreciating nature. Savor the view and drink in the outdoors.
Stay hydrated.
Bring water or sports drink to keep you hydrated. These days there are many alternatives, even sugar-free drinks have electrolytes in them. Also, don’t forget to clean up your mess, make sure you leave the campsite and trails in better shape than when you arrived.
Plastic and paper ware.
Some people are concerned about filling up landfills. Keep in mind the total amount of plastic consumed in one knife is pretty small. Of course you have the option of washing and reusing any plastic products you use. If you use paper products you can burn them in the campfire so you’re not leaving that in the landfill. The plastic ware doesn’t need to be washed right away, just rinse it off and leave it for when you do the dinner dishes. As long as they are rinsed off, they won’t attract bugs, and then you can thoroughly clean it later with hot water and soap.
Snacks.
There are a lot of healthy snacks available. The grocery store has a wide variety from less healthy, empty calorie-type snacks to nutritious.
BJ’s and Costco have boxes of individual servings of trail mix, which are convenient to stick in your backpack for the trail. Optionally you can purchase ingredients and make your own with a variety of nuts (cashews, peanuts, almonds), chocolate (either m-n-m’s or chocolate chips, but if it is warm, it will melt), mini-marshmallows, Chex mix, cheerios, raisins, cranberries, or any kind of dried fruit. The nice thing about making your own is that you can choose the nutritional value of each serving. Most store-bought trail mixes have a lot of sugar in them. Keep in mind that just because it is a trail mix doesn’t make it health food. In fact, some have as much sugar as a candy bar.
Unless it is cooller outside, chocolate is probably not a wise snack as it will melt. Energy bars are an excellent option, just look at the nutritional information on the bar. Trader Joe’s or Whole Foods tend to have the healthier options.
The challenge with breakfast is that it’s early, and while camping you’ve got multiple things going on to consider. The first thing is that you’re sleepy because you just woke up. Once everyone else is awake, they’ll want to brush their teeth, use the restroom, freshen up, and so on.
Sometimes the most urgent need is….caffeine.
If at least one person in your party has a caffeine requirement, you need to consider how to meet that. So, for example if you’re used to coffee, then consider bringing soda or a cold cappuccino drink instead. There are options for solving a caffeine craving without ever lighting a fire. So, consider a cold form of caffeine that comes out the cooler, or just sits in the car, depending on the temperature outside. These options allow you to either take your time building a fire or not build one in the morning at all.
The Kelty Pot.
A Kelty Pot looks like a big coffee pot but it is hollow in the middle with a stainless steel, steel, or aluminum base. You put twigs in the hollow part, light them, and as the heat rises up the center of this pot, it heats the water in the surrounding jacket. That’s probably the easiest way to get hot water. The negative part is that you need to sit right there and keep feeding twigs into the hollow section to keep the tiny fire going. There’s really not a lot in that combustion chamber, so the fuel exhausts quickly.
Keep in mind there are places, usually National Forests, where you’re not allowed to pick up twigs, branches, leaves, limbs, horn sheddings, therefore you’ll need to bring something combustible with you. So check where you are for restrictions. But, if you have a supply of twigs, then that Kelty pot is awesome. They’re about a hundred bucks and it’s a solid lifetime purchase.
Different approaches to breakfast.
Some people don’t eat breakfast. Some like a mid-morning snack. But, when camping and exerting extra energy, breakfast may be a must. It all depends on who is with you.
One simple hot breakfast option is oatmeal. All you need is some hot water to make it. There may even be sources of hot water if you’re at a campground with a short walk or drive.
To build a fire, or not.
The next thing you’ve got to consider is where you are. There are locations where you cannot build a fire for different reasons. There are places where there’s no firewood.
If you’re planning on building a fire first thing, then I would suggest whoever the fire builder is needs to be up forty-five minutes before everybody else. That way you have time to build a campfire and get all of that going before the other people in your group rise.
And the other question is . . . “can you” is not as important as “should you.” Say you’re in a rush to get a fire going and it’s not cooperating, and everybody’s ready to go and they’re hungry, that doesn’t make for a pleasant memory. It might be quicker to stop at a restaurant on your drive to a hiking spot, or to eat something cold from the cooler.

Perhaps a small stove will work.
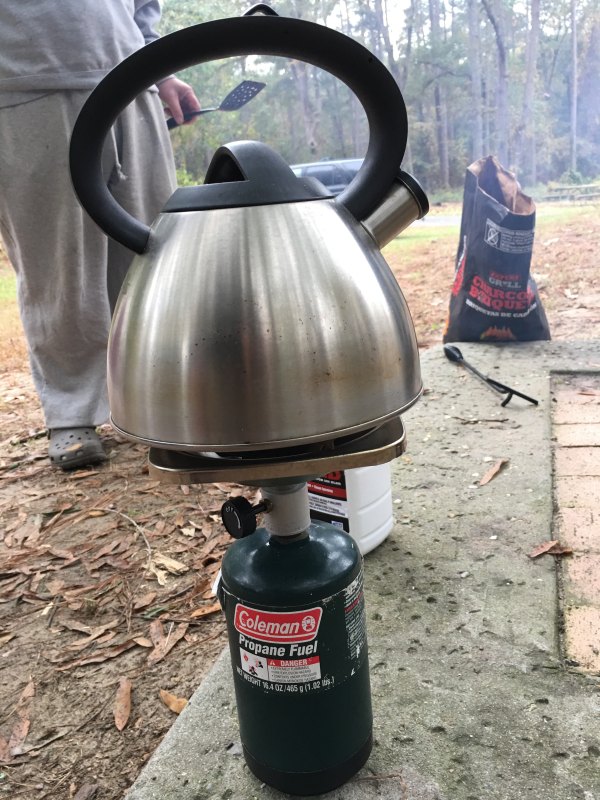
You light a stove and a couple minutes later, you’re starting to heat up a pan full of water, or a frying pan or what have you. The stove is a really great alternative. There are a lot of options. They run from fifty to a hundred-and-fifty bucks. Basically, the traditional Coleman stove type that sits on top of a table has usually two burners. The Coleman stove is ubiquitous when it comes to camping. They have been around at least seventy years. They come in white gas or propane. I would suggest if you’re purchasing one buy the propane, because it’s the cheapest to operate. There are also small backpacking stoves that are butane, they are small and you can get a lot of fires out of them. The difference is that with a Coleman stove, you’ve got two large burners, and you can actually heat up a lot more volume of water than you can with a small backpacking stove. There are now one-burner versions from Asian vendors that run off butane. These are small, don’t take up a lot of space, and are very easy to use. The Coleman ones are extremely robust. I’ve fixed many of them with a pocketknife and a paper towel, which is helpful when you are out in the wild.
So, a small stove is nice because you sit it on the picnic table or on the ground and light your fire and then a few minutes later you’ve got water for your coffee. If using a small stove, I would recommend testing it at home before you leave. And making sure you have ample fuel.
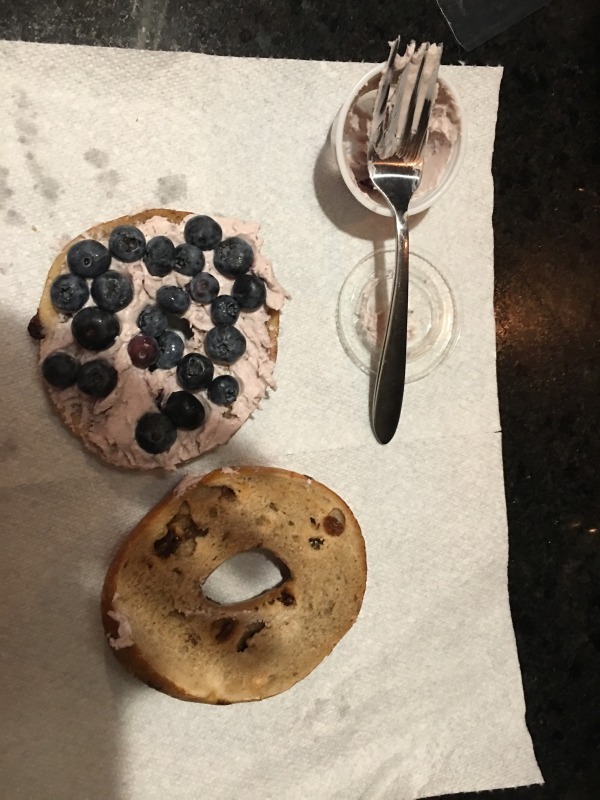
Cold breakfast options.
If fixing a fire first thing in the morning is more work than you want, or if your group has an early activity planned, then consider a cold breakfast. Some successful items that I’ve tried with my family are bagels with cream cheese or peanut butter and jelly sandwiches. These are awesome ways to get something quick that doesn’t require a lot of prep or cleanup. A few other ideas are nuts, energy bars, pop tarts, or trail mix. If you have a cooler, you could have cereal with milk, hardboiled eggs, cottage cheese, or yogurt.
On Pinterest or Google, there are many other creative ideas for simple camping breakfast recipes and ideas. You just need to evaluate them based on the need for heat or a cooler, and if those are readily available to you. Can you do it with just hot water? Can you do it with no heat?
What kinds of skillet to use.
If you decide to heat over an open fire or a small stove, I highly recommend a cast iron pan. Aluminum pans are harder to cook with over the fire than cast iron. Aluminum conducts heat quickly and changes temperature quickly. If the flame is an uneven temperature then the aluminum won’t cook evenly. So I would suggest a cast iron skillet.
Cooked breakfast options.
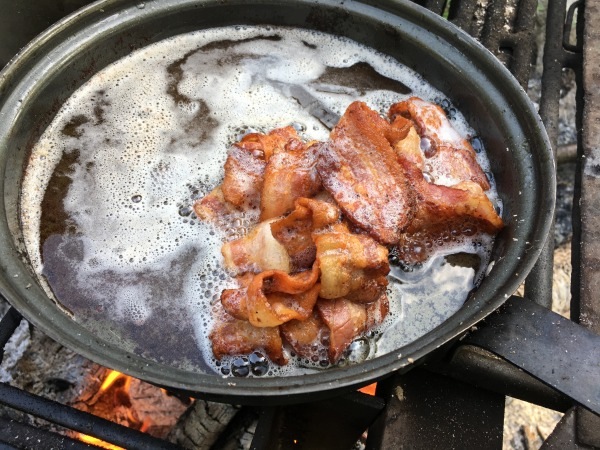
One thing that is spectacular about a campfire is bacon. Most mornings we cook bacon or sausage in a cast iron pan. After cooking the meat, I reserve a little grease and then cook the eggs with that grease. I’m telling you, the fact that you’re hungry because you’re burning a lot of calories that you normally don’t and you’re out in the woods with campfire smoke lingering, those bacon and eggs will smell and taste luscious. Bacon and eggs is a simple and extraordinarily satisfying meal at a campsite.
Other cooked ideas for breakfast would be sausage, sausage patties, and link sausage. A lot of times adding a little bit of water to help even out the heat helps the sausages cook better.
One thing I would encourage you not to cook is pancakes. They require nice, even, controllable heat which is difficult on a portable stove or a fire. You may be the pancake master at home but pancakes and campfire can be tough. If you really want to try them, bring a cast-iron griddle to help even out the temperature. Even at that I would encourage you to make small, simple pancakes, not stuffed ones as they will get tough because the heat is so uneven.
Nifty “burrito in a bag.”
A “burrito in a bag” is made up ahead of time. At home, assemble eggs and ham and onions and pepper or whatever you want. Place it all together in a plastic bag. At the campsite, all you need to do is put the bag in hot water. The hot water cooks the eggs and basically makes an omelet. Then, you can eat the food right out of the bag; maybe even use a plastic spoon if you want. That way you don’t have a lot of clean up, because your pan’s just boiling water. This is an easy and quick breakfast option. The work is done ahead of time at home.
Cleaning a cast iron pan.
Your cast iron pan will be much easier to clean than aluminum or steel. A heads-up, if you haven’t cleaned a cast iron pan before, it’s a little different. You shouldn’t soap it up, because it’ll absorb the soap taste. Use hot water and a sponge or stiff brush. If the food remains stuck on, mix up a paste of course kosher salt and water to use as a rub.
General clean up hints.
When we cook bacon, we pour most of the grease into a cup to dispose of later. Don’t pour it on the ground as this will invite critters into your kitchen area, which you really don’t want.
Cooking over an open fire or small cooktop requires clean up time. So, allot at least an hour or more from the time you light the fire until you are prepared to leave your campsite.
To get the cleanup done quickly, try to make it a joint effort. Also, you want to make your cleanup process sanitary because the last thing you want is food poisoning. Make sure to cook meat first, then the eggs in the grease—which will give you really good tasting eggs.
Other breakfast options.
The other thing to consider is what your plans are for the day. If driving to your activity you will pass by a Bojangles or somewhere to eat breakfast, one option is to stop along the way. This will save time in the morning if there are no early risers in the group or no one interested in cooking. Because, let’s be honest, cooking and cleaning up a hearty breakfast is time-consuming. Another option, depending on the location of your campsite, one person could get take-out for the group. I think the trick is to size up what everybody’s state of mind and the state of their stomach will be first thing in the morning, then base your breakfast meal plan on that. That way you’ll have a lot happier people.
Building a fire.
I go into how to build a fire in a later chapter, but I will say the key to a fire is in the preparation. Before you get to the site as well as while you are at the site. You need some sort of kindling; you need some small stuff, and as the fire grows you’ll progress to bigger pieces. And it definitely takes a little bit of time. The more you do it, the better you’ll get.
Baby steps.
I would not suggest full-blown cooking over a fire on your first camping trip. Instead what I would do is have a stove that you’ve tested ahead of time. It’s quick, it’s easy, and it doesn’t get in the way of that priceless moment. I think after you’ve had some experience at building a fire and getting your camp kitchen set up how you want it, then breakfast can be a nice, hearty thing.
Our normal routine.
My wife, Connie, likes to have a nice warm breakfast, so I get up first thing and build a fire. I’ll have hot coffee and water boiling in a big pot by the time she wakes up. Many times I’ll actually have the bacon started and the wondrous smell is what entices her out of the tent. But, we usually don’t do a lot of heavy activities first thing in the morning. I wake up at the crack of dawn, start coffee and breakfast, and we tend to have leisurely mornings.
When we had young children, they were ready to go when the sun rose. That was a time in our life where spending an hour and a half cooking breakfast was not the best choice. A cold breakfast or a meal at a fast-food restaurant worked best for that phase. On the flip side, when they became teenagers they didn’t like to get up before noon. In those days, Connie and I were able to have a leisurely morning and cook a hot meal so that when the kids got up, they could scarf down the leftovers and we could start our day. So my point is that you need to right-size it for what your family needs at the time.
Bottom line.
If in doubt, my suggestion is to go with a cold breakfast, something you can do without heat. Keep it simple, and kind of go from there. The point with all of this advice is to know what your skills and abilities are and operate within that framework. Be aware of your plans for the day and make sure breakfast ties in properly, as your focus is on finding that memorable moment.
Check out my books on camping
When you’re active, your level of physical activity determines how much heat your body generates.
At the same time, the weather can change quickly, so the amount of clothing you may need to keep you warm varies over the course of the day, and over the course of your activity.
If you’re really active, let’s say you are on a long hike, then your exertion is creating a lot of body heat. You want to reduce the amount of heat you’re maintaining in your body so you stay at a comfortable temperature. Getting sweaty means you have wet clothes, which don’t keep you warm later. Staying comfortable, no matter what the weather, is critical to enjoying the trip. The clothes you wear are a huge part of your comfort.
Year round you need to be concerned with staying dry, in colder weather, you need to make sure you stay warm.
Regulate your body temperature with layers.
When you become warm, you can take off a layer. When it gets cold outside, you can add a layer. A lot of times people don’t realize how easy regulating your body temperature is and how much it contributes to your comfort outdoors.
For example if you go from a seventy degree house in the middle of winter to a twenty degree car, you’ll have on a thick coat to stay warm. Once the car warms up, you take off the coat. The coat kept you warm until the car heated up, and then you shed the outer layer. On the flip side, if you’re outdoors and you have the same thick coat on in a chilly climate, and let’s add that you’re moderately active—you may need half of the insulative value your coat can provide. With common sense, you’d unzip it which means your arms and back would stay warm and your chest cold. The best way to regulate your body temperature outdoor is to dress in layers.
In the above example where it is cold out and you are exerting energy, you might want to dress in multiple layers, so you take layers off and on during the day as you exert energy and feel warm, or as you move into shady areas or stop for a break and feel cooler.
You also need to be concerned with moisture; in this case rain or snow. A common approach is to have a water-proof or water-resistant outer layer.
Base layer.
The base layer is usually a wicking or poly fabric. This is the layer that touches your skin. Silk is the best fabric because it pulls moisture away from your body. When moisture touches the skin, you’re not as warm and you get cold. Those materials pull dampness away so it doesn’t wick the heat directly away from your body. There are two parts to the base layer, the shorts (or long johns if it is cold) and the top.
You’ll notice I threw out the names of different fabrics you’ll see in these situations. One of the materials I didn’t mention was cotton. The problem is when cotton gets wet; it’s going to be cold. Wool has a certain amount of natural warmth even when it’s cold, and so even a wool shirt that is wet or moist, provides some percentage of warmth without being totally dry. The point is cotton, once wet, won’t keep you warm.
Weights of base layers.
They can be light, medium, and heavy weight. What you wear depends on the weather you’re in. Most of the time, you’ll end up with medium weight. Base layers are often long sleeve, pullover—so think long underwear. The bottoms are the same. Your base layer, top and bottom, both wick moisture away.
The next layer.
The next layer may be a sweater or wool shirt. You may choose to have a thicker layer on top of that; and on top of that, you might have your jacket (often water resistant).
Consider your camping experience and how close you are to town.
Let’s say you are camping close to stores or in a campsite with hundreds of people, and the weather’s not extreme, perhaps in the fifties and sixties and seventies, then don’t feel like you need to go to REI and buy a bunch of high-performance clothing that’s expensive.
When the quality of layers matters.
As your level of adventure and length of camping trips increase, or you camp during cooler weather, the more you need to think about the quality of your clothing. The outer layer, a waterproof jacket, is critical because keeping water away from your body is the number one thing in staying warm and comfortable. Like I said in an earlier chapter, if you are remote and on an adventurous trip, everyone in your party should have a light-weight waterproof jacket in their pack. After that, having layers you can unzip and take off and store easily, makes it simple to change the amount of clothing you’re wearing based on your level of activity and the weather outside.
The other time when higher quality clothing matters is when you choose to camp or hike in remote areas where there’s a chance you won’t see another soul or perhaps when getting from your campsite back to civilization may take hours. Also, consider your drive to your destination. Are you driving through an out-of-the-way area? When a car breaks down in a remote location and the passengers aren’t prepared, especially clothing, for the weather, deaths can occur.
Warning.
I would recommend not dragging your family out somewhere in very cold conditions if they’re not used to it because the chance for fun is low. Camping in the snow can be awesome, but you need the skills and equipment and motivation. Keep your first camping trips easy, one where your only concern is for possible rain. Don’t make your first camping trip with family in February when it’s twenty degrees out and everybody is struggling with just keeping warm. Instead, make your first camping trip somewhere where it’s maybe sixty to eighty during the day and forty to seventy at night and everybody will be nice and comfy.
Wearing cotton in cold weather.
Most of the long underwear you see out there is actually made of cotton, which, as long as you can stay dry, is fine. If you get wet, then it gets cold. If you’re close to the tent, close to other people, then that’s probably okay as you can just change into dry clothing. The challenge is if someone wanders off and gets lost; then all a sudden staying dry becomes critical because you may not find them for twelve to twenty-four hours. My point is to use your judgment as far as where you’re going to be, and how far away people are going to get from camp or if you go on a day hike.
The other possibility is you go on a day hike, you pick this six mile hike and three miles in rain starts. The temperature drops twenty degrees. At that point, you’ve got some decisions to make, and hopefully you’re prepared and you’re not having too miserable of a hike back to the car while you’re wet and cold. So there again, it’s based on your level of adventure and risk. If you’re going to go on long hikes, then being prepared to keep everyone warm and dry is in everybody’s best interest.
What happens if someone gets injured.
What do you do if someone gets injured? For example, you and your spouse are hiking and you twist an ankle so bad you can’t walk. Let’s throw in no cell service. You can see how having clothes to keep you dry and warm could be a lifesaver. So, your spouse has to go and retrieve help. You might be talking four to six hours. It might take an hour-and-a-half to hike back, then she needs to figure out where to go, then she needs to go there for help, then medical personnel need to arrive, and finally they have to hike that hour-and-a-half to get to you. You can see how you could be waiting for hours. If you take shock from the injury and add that to the mix, hypothermia is a real threat.
Purchase high quality camping gear on clearance.
Just because last year was a different color than this year, it doesn’t matter because you can save seventy-five percent. The point is, for clothing you’re going to want quality. When you are out and about, it is critical to stay dry because it’s easy for something to happen and then you are stranded somewhere for some number or hours, or days, without protection from the elements. Consider buying clothes you’ll wear at other times so you make the best use of your budget.
On top of the layers, use fabric for warmth.
Dress in layers and then use fabrics that retain their warmth, such as a wool or Quallofil® or Hollofil®. Some fleeces are good about maintaining some level of warmth even if they get wet.
What jacket to purchase?
Breathable jackets are the best. Of course the king is GORE-TEX®, but they’re expensive. There are other materials that don’t breathe quite as well as GORE-TEX® but still keep you dry and breathe to keep you from getting sweaty. I have a jacket I’ve used for ten years of camping and hiking that’s just now starting to lose its performance when it rains. A quality jacket is a staple and a great long-term purchase.
For kids that will outgrow their clothing quickly or drag it through the mud, it’s a shorter-term purchase. Consider the length someone’s actually going to wear it when you think about how much to spend. As I said earlier, for your first camping trip keep things simple so you’re not far from home or not far from other people. When you lower the safety risk, you can get by with lower performance clothes, for example cotton.
How to dress in layers.
Dressing in layers means you can peel off a layer as you get warm; peel off another layer as you get warmer or because your activity changes or the weather heats up. When you are more sedentary or the weather cools, you can layer back on.
As the weather gets colder, it’s nice to have two, three, four or five layers. But, instead if you’ve got a giant down coat and you take it off and all you have left on is a shirt, then you may find yourself cold. Whereas if you have multiple layers then you can better match the amounts of clothing you have on to stay comfortable—not too hot, not too warm. When you think about staying warm, sweat is your enemy. For example, if you have on too many layers of socks and your feet get hot, and then sweaty, inevitably they’re going to get cold. The same concept works for the rest of your body. If you’ve got many layers on and you’re really active and you start sweating like crazy, take some layers off quickly. Sweat is water coming from your skin and hopefully gets wicked away by the base layer.
Depending on how well your layers breathe, that wetness can take a while to go away and can make you uncomfortable. The more layers you have, the more difficult it is for that moisture to get wicked away and removed from inside your first protective layer of clothing.
Let’s jump into an example. Say its fifty degrees outside and you’ve got three thin layers and you’re hiking. Take off the top two layers and put them in your day pack and keep going, they won’t weight much as they are thin and lightweight. But if you’ve got a thick layer on, it may be problematic to fit the thick layer in your bag. The weight of your pack is something to consider.
I know a lot of times I have a Carhartt® jacket that’s real thick and real warm, and tough as nails. But sticking it inside of a backpack would be difficult as it is bulky and heavy. Because of that, and because it is cotton, I don’t wear it hiking. Instead I wear it when I am working outdoors. Or sometimes when I’m hunting, but when I’ve taken off my thick jacket I’m around the campsite so I don’t need to carry it in my pack. I wear that jacket because it’s warm in the winter.
Don’t forget your hands, feet, and head.
To stay comfortable outdoors, you want to keep your hands, feet, and head warm. Make sure you’ve got socks and properly fitted boots to keep your feet toasty. Also gloves for your hands. Don’t forget a hat for your head.
However, it’s important to note that your body wants to keep your brain warm. If you think about it there’s not a lot between your brain and the outside elements. You got a skull and you’ve got some skin and then, if you’re lucky, you’ve got some hair. My wife, Connie, who has wonderfully long hair, will wear a fleece headband because it’ll keep her forehead and ears warm. In mild temperatures, she doesn’t need a hat because her hair keeps her warm. So many hats and toboggans are not good at blocking wind. If it doesn’t block the wind and it’s windy out, then you lose the effect of the insulation. Now I have no hair to speak of on top of my head, so my head gets cold when I’m outside. When I’m in a sleeping bag I need a hat so my head doesn’t get cold. If you’re bald, you’re going to need more coverage for your head than if you have a full head of hair. A lot of times I’ll wear a ball cap until the temperatures really drop, and then I’ll wear some sort of toboggan. The good thing is that hats or toboggans don’t take a lot of space. You can put them in your bag, carry it with you, or clip it to your belt.
Make sure your layers insulate, even when wet and windy.
Consider how well each layer insulates when it’s wet, as well as windy. Some fabrics, for example, your favorite fleece, might work fine walking from your house to your car on a dry, chilly day. But in severe wind or rain it isn’t wind or rain resistant.
Some of the new fleeces, like the soft-shell, are made to keep the wind from blowing through. All fabric is made to trap a thin layer of air close to your body. Your body then heats up that thin layer of air and the heat gets trapped between the clothing and the inside of your body. That’s why warmer clothing gets thicker, because you need more airspace. If the wind is blowing, or if you’re moving, then all of a sudden you have this wind blowing across your clothing. If your clothing isn’t wind resistant, you lose your body heat quickly. Improper clothing ruins the effect of having that warm pocket of air around you.
Some jackets are more wind resistant than others, it really depends on the fabric. Wind resistance can be pretty high when camping, so you may find that you’re cold. Let’s say you have a base layer and a fleece on top. Or maybe you’ve got a T-shirt and a fleece over top. And you’re cold. And it’s windy. If you had a breathable waterproof jacket you could put on top, you’d be much more comfortable than you were before. The point is to keep the wind off of you as much as possible. Once you invest in a waterproof jacket, you’ll find a lot of uses for it besides camping.
Beware of certain fabrics.
Inexpensive fabrics don’t do well against your skin. A good example is acrylic. If you have an acrylic toboggan, it’s really easy for your skin to sweat where the toboggan sits up against your skin. Cotton is another problem—when the weather is mild, it’s fine, but when it gets wet, it’s going to be cold. Wool is pretty awesome for keeping you warm. A nice wool shirt can be expensive. So, you’ll just have to trade off some of that where-am-I-with-this-budget-wise. Poly fabrics can be great for base layers. Wool may or may not be because it can be itchy.
I’ve got a long-sleeve pullover shirt that’s a wicking material. I’ve had it for twenty years, and take it camping most of the time. For the thickness, the shirt keeps me fairly warm and works great on cold mornings in the spring or fall when it’s about fifty degrees. A lot of times I’ll have a tee-shirt on under that.
You’ll have to experiment with what works in what temperature for you. Everybody’s a little different and everybody has different tolerances for heat and so forth.
You may want to try some of these clothes before you go camping with them. If you buy something, wear it to test out the warmth. Kids need to be watched because it’s easy for them to sweat and not think about being totally soaked, and all of a sudden they realize they’re cold. Remind them to take a layer off if they start sweating.
Frostbite.
Frostbite is an enemy if it’s cold outside. The temperatures don’t have to get that low before your skin can freeze. You need to be educated and prepared. If someone’s toes or fingers get cold, you need to know. If it’s cold enough there’s a potential for frostbite.
Make sure everyone in your party understands the significance of cold digits and frostbite, that way enthusiasm for some activity doesn’t result in a nasty injury, especially with kids and older folks.
You may not realize how cold your fingers and toes are because our extremities often feel chilly during the day. Say you’re in a sixty-eight degree room and you go outside for a few minutes, your skin temperature drops to fifty and you don’t think anything of that. You just go back inside and heat up. My point is you are used to having these swings in your outer skin temperature, because it just happens. Your extremities chill quicker than everywhere else. If you don’t take that seriously, it would be possible for frostbite to creep up on you. You saw the signs in the back of your mind but didn’t do anything about it, and now you’re in the hospital getting treated for frostbite. Teach everybody the signs and keep reinforcing them. If somebody gets cold, take action immediately to warm up the extremities. Keep in mind that if your head and extremities stay warm, it’s a lot easier to keep the rest your body warm, especially in a sleeping bag.
Wrap up.
Make sure to dress in layers. Use wool or fabrics that wick for the layers. Make sure the fabric against your skin wicks and is comfortable. Make sure the outer layer is waterproof as needed. You may not wear your waterproof jacket all the time, but it adds warmth in normal circumstances, especially when it’s windy.
Check out my books on camping
If you grew up in the country and split your own logs you can skip this. In this chapter we’ll talk about the four types of wood. Going from smallest to largest, the first is tinder, then kindling, then wet wood, and finally dry wood.
Tinder.
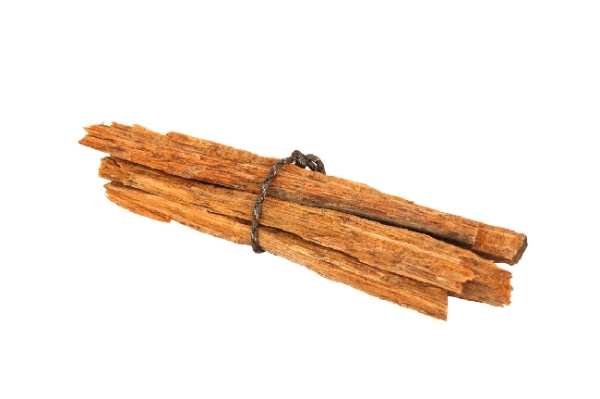
Tinder is lightweight and burns fairly hot for a short period of time. You use it to light larger pieces of dry wood. That’s really the concept of a fire—you start with small stuff that’s thin and ignites easily and at a hot temperature, so that you can then light something a little bigger and then a little bigger, then even bigger. Tinder is the easy-to-light fibrous stuff. It’s not going to burn long. Usually if it’s easy to light and puts out a lot of temperature it’s going to burn pretty quickly.
Tinder is basically a fire starter and comes in a variety of forms. One form is off a log from a long-ago-dead tree. You strip back the bark and you’ll find a fibrous and lightweight layer between the bark and the tree. That layer is easy to light.
Another form is newspaper or fire starters you can buy from the store. You can make your own fire starter with a combination of sawdust and wax, put the mixture in a paper egg crate. There are other ways to make fire starters, just check the Internet. There’s a lot of ways to start a fire.
I will warn you to stay away from leaves as they usually put off a lot of smoke and not a lot of heat, instead you want to look for soft, dry material.
Kindling.
Kindling is broken or dead branches and other forest litter whose diameter starts from the size of your thumb on up. Unfortunately, not all branches around a forest are dry.
If a branch is dead, (i.e., no leaves, no green growth) that tree is no longer able to provide nutrients and water to the limb, so it’s going to be dry. If it’s appropriate where you’re camping, you can snap off a dead branch and use the tips to start your fire.
Squaw wood is where you have dead wood that is up off the ground. For example a fallen limb stuck between two branches, or maybe it’s still attached to the tree and it’s about to break off, or it’s lying across a couple limbs and has broken off. Since it isn’t on the soil, it’ll be drier than branches sitting on grass or dirt. That’s the kindling you are looking for because moisture from the terrain hasn’t been saturating the timber, especially if it hasn’t rained lately. It will tend to be drier than the wood lying directly on the ground. Dry wood makes it easier to build fire.
If you’re out in the western part of the country, humidity is extremely low and it’s not really a big issue. If you’re on the eastern part of the country, or say you’re in the Appalachian Mountains, humidity can make starting a fire tougher because that wood can absorb moisture from the air. A bigger problem is when wood absorbs moisture from the ground. Damp wood is hard to light.
Dry wood versus green wood.
The drier the wood the quicker and the hotter it’s going to burn. Wet timber is harder to ignite and you’ll find it burns longer at a lower temperature. Our tinder lights our kindling, then as the fire builds you’ll use bigger pieces of wood. That kindling may be the squaw wood or branches you know are good and dry.
Check local ordinances.
In some areas you aren’t allowed to pick up dead wood. It depends on the status of the forest you’re in. So collect small pieces of kindling from your backyard before you leave home and bring them with you, maybe in a bucket with a lid to keep it dry. Break them up into a bunch of small pieces and you’ve always got that available.
Make sure there isn’t a fire prohibition in the area.
Sometimes it gets dry in the summer and there will be a prohibition against campfires. When the park, or county, decides there is a chance for forest fires, they may ban campfires. Always check before you leave to go camping.
How to build a fire.
When you start your fire, tinder is going to be underneath very small pieces of wood. One way to think about this is how a tree grows. You have a trunk and branches, and the branches branch into twigs, and eventually you get out to the tip where the buds are. This smallest wood tends to be less than an eighth of an inch in diameter.
If you have a fire starter and you put it underneath an eight inch diameter log, that combination is not going to catch the log on fire. Building this fire is a matter of starting and working through these stages: easy to ignite; very small diameter tinder-type stuff; up to kindling; up to what we’ll call firewood.
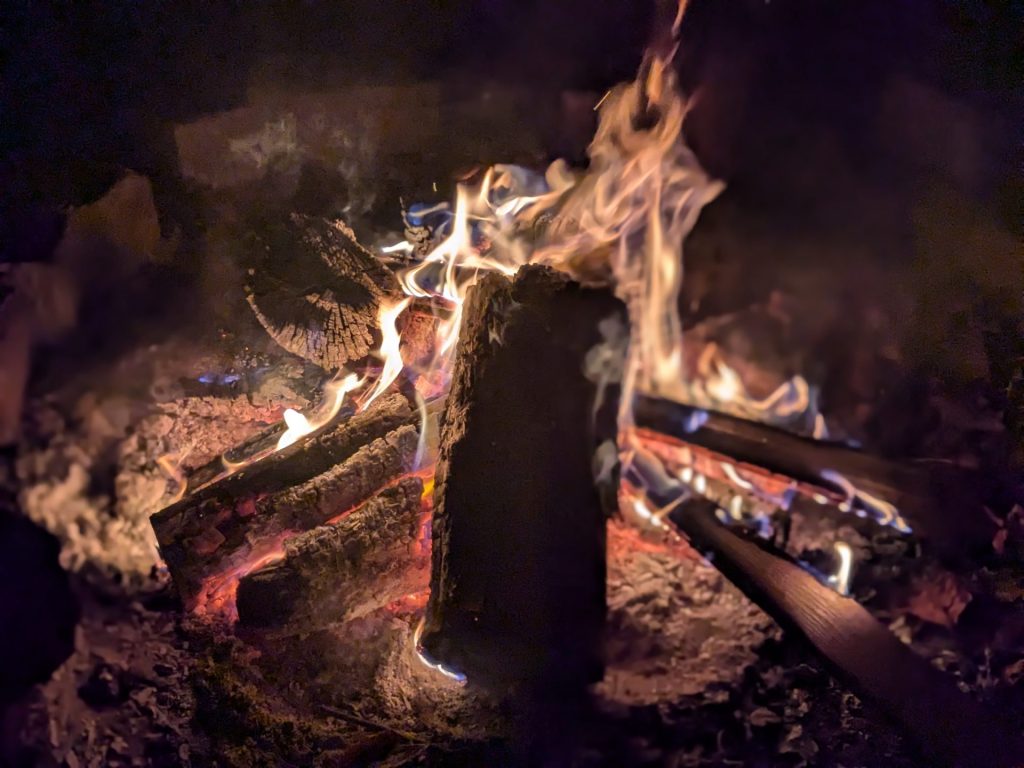
Build a fire with tinder at the bottom, then twigs about an eighth of an inch in diameter, then sticks about a quarter of an inch in diameter. The tinder lights the twigs, the twigs light the sticks. As the fire grows you add bigger and bigger fuel, but take it slow or else you’ll snuff the fire out. When you get to where the kindling is the size of your thumb, then you start looking for small pieces of dry wood about two times your thumb.
My point is to slowly build up your fire by increasing the size of the timber. At some point you’ll notice burnt pieces of ember dropping down and creating a bed of coals. This is the stage where if you’ve gone ahead and split some logs into pieces about an inch by an inch square, by whatever the length of the wood was, maybe 16 inches, then you can start putting those dry logs on. This wood is more substantial than the twigs, so they’re going to burn hotter as they catch on fire. At this point you can add bigger logs.
You may also want to consider building a square chimney out of your smaller split wood. Then you can start your fire down in this hollow chimney. This will trap the heat from the tinder and progressively larger pieces of wood and help to protect your incipient stage fire from wind. This approach also warms up the split wood and eventually ignites the larger pieces.
Later in the evening you may want to throw on a big log as a backstop. It will sit there and start to catch on fire. It’s going take a long time to ignite, but when it does, it’s going to burn for a long time, which is awfully nice while enjoying the campfire.
Once you have a bed of coals, you can start introducing some green timber because it burns slowly. The advantage is you’re not going to have to add wood as often. Though your fire will not get as hot, it’ll burn longer. That’s the point in the evening where you’re looking to sit around the campfire. If you’re going to cook something for a long period, sometimes small pieces of green logs will help stabilize the cooking temperature. Keep in mind, if wood is very green, then it won’t burn well and you will have problems keeping your fire burning. Avoid that frustration and enjoy the fire by using dry timber.
Scraps of wood.
Once, when we were camping in Bear Den Campground in North Carolina, right off the Blue Ridge Parkway, I met a cabinetmaker who saved his sawdust and wood scraps in a bucket with a lid. Over time, the bucket full of kindling became bone dry. He used that to build a fire which worked really well. So, if you’re a wood worker, save your scraps. Break them down into small pieces, and use that to start your fire.
Buckets for kindling.
You can obtain free buckets at Walmart or any grocery store from the bakery department. They may have a bucket full of icing they’re working from. A lot of times they’ll give you those buckets and they’ll have lids. Are they waterproof? No. Are they water-resistant? Yeah, for the most part. So, you can probably keep your stuff dry.
Or you can go to Home Depot or Lowes and purchase three-gallon buckets in the paint department for about three dollars. They also sell lids that snap onto the bucket. Home Depot has started carrying Omega Lids with an O-ring which makes it water resistant. Put your woodworking scraps or kindling in this bucket and screw on the lid, now you’ve got dry material to build your fire. Though it will take room up in your vehicle, if you’re planning to build several fires it sure makes life easier. Depending on where you’re camping, you may need to bring in all your wood.
Warnings.
Do not go to bed or walk away from a fire until it’s out. Out means you can put your hand over where the coals were and the area is cool. Fires can re-catch and you can start a forest fire.
Once you start a campfire, you have to tend it. You can’t go away for thirty minutes because something could go wrong. The fire could spread and you start a forest fire. Always watch a fire. Be careful. It’s a great tool. Like any tool, fires deserves respect and a little practice.
Using an accelerant.
Keeping a source of tinder and kindling with you is awfully handy. Another thing you can do is use an accelerant. So, let’s say you have lighter fluid and you want to build a charcoal fire. You can soak your wood in it for maybe ten or fifteen minutes before you light it. If you don’t give it time to soak in, the lighter fluid will sit on the surface and when you ignite it, there’ll be this giant poof of a flame and then it’ll be done and not a lot will catch on fire. Optionally, kerosene or diesel work well.
The challenge is whenever you use an accelerant, you introduce risk. When you light this thing, it’s going to ignite quickly and burn hot. Be careful, you don’t want to burn yourself or start a forest fire. Let’s say you’ve got a bundle of wood about a foot by a foot by a foot and you pour a gallon of white gas on it and you let it soak for an hour. When you light it, it’s going to give you this little mini fireball. That wood is going to burn for hours, you’ll have a hard time putting the fire out. And so, as a result, you want to avoid using an accelerant.
I will admit I’ve had times where I’ve been forced to use an accelerant. Either it was pouring rain or for some reason I was having a hard time keeping the fire started. I’ve used kerosene or white gas, but I will say I’ve had some negative experiences. So, I recommend staying away from an accelerant for camp fires.
For example, if you were to hold the white gas container in one hand while you light the fire, when the lid fell off the white gas container, you would understand the unpleasant experience. Alright, I was seventeen at the time and stupid. Learn from my mistakes and stay away from accelerants. Thankfully it was a small bottle of white gas, one of the ones we used for a backpacking stove. We got in a hurry, wanted the fire to light; threw some white gas on the wood, picked up the lighter, unbeknownst to me gas was on my hands, and there was this little bit of a boom, and it scared me! I dropped the gas container and the next thing I knew fire was everywhere because the white gas ignited. It was bad idea. I learned a valuable lesson.
If you choose to use an accelerant, go easy. Ninety-nine percent of the time you can build a fire successfully with what you have. If you’re in the Appalachian Mountains and it’s been raining for two weeks and the fog is rolling in and everything you have is soaking wet, then you’re going to have to make your own decision. I would encourage you not to use an accelerant, just because of the risk. You know, lighter fluid works fine on charcoal because charcoal absorbs the fluid readily. The wood may or may not absorb the accelerant as readily and so you can have a situation where it’s on the surface of the wood and not absorbed. Be careful.
Exceptions.
With a rocket stove, you’re going to stay with fairly small sticks the whole time, and you won’t need a stick bigger than three-eighths of an inch. That’s the advantage of those; they’re very efficient. If you use a Kelly Kettle, you’re going to use small twigs the whole time. You want to have a big stack of small twigs and just slowly feed the fire. The difference with the rocket stove and the Kelly Kettle is that you get hot water quickly. The downside is they need constant feeding of fuel. The very good thing is that you really don’t need much fuel to heat your water. A small box of small twigs can get you through several pots of coffee or bowls of oatmeal.
With a campfire you get up and add some fuel or branches or a log, every five or ten minutes when you get it going; maybe longer if it’s really going well. But with a rocket stove or a Kelly Kettle , you’re going to feed it constantly. If you walk away, it’ll just go out, because there’s just not a lot of fuel there and not a lot of thermal mass.
More complex fire arrangements.
A Dakota Hole or some rocket stoves rely on the fact that the heat is hottest at the tip of the flame or slightly above the flame, and so you build a fire in a teepee style. There’s a bunch of styles you can use— square or teepee to name a few. You could even use the Swedish fire log approach, which is really cool. You could even use a Swedish fire log approach, which is a little different and unique. Some people out west use Dakota holes. I’ve never built one that way, though it seems kind of cool. We’ve built a half Kiva before on a windy trip. There are a lot of specialized ways, but most of the time you’re sitting around a campfire, and you build a fire inside a little ring of rocks.
Wrap up.
The best way is to use a fire starter. Use tinder. Use kindling. Start small with your fire. Make it bigger. You definitely want to keep in mind that the heat is going to be the hottest above the flame, or at the top of the flame. Successful fires push hot air across the wood.
YouTube has videos on how to build a fire. There’s tons of stuff written about how to build a fire. And so, it’s something you want to figure out, what fire building approach works best for you.
Check out my books on camping
On your first trip, I’m sure you’d like to avoid going out and spending a lot of money on expensive gear, but keep a couple of things in mind. If you’re in a commercial site where there are many other campers around and you’re ten minutes from a bustling town and you have no plans to venture anywhere else, then you don’t need to purchase a lot of camping clothes. On the other hand, if you’ll be in a remote area far from others, then you have to be prepared for anything.
Keep in mind the high and low temperatures.
When we are home, we are used to a seventy-three degree house during the day and sixty-eight at night. When you’re outside camping, you can easily see a ten, twenty, thirty, forty, fifty degree swing over the course of the day. I will say it depends on where you are. Usually the largest fluctuations occur where it’s dry, because there’s less moisture to trap the heat, as well as at higher elevations where you find a bigger temperature swing at night. Say it’s seventy during the day, and forty at night. That’d be a thirty degree difference. We have seen swings from 85 to 30 many times in the mountains, especially in the high desert.
Stay warm. Stay dry.
The way to remain alive is to stay warm and dry. It’s very important to keep yourself in a situation where you can stay alive, because the number one killer of outdoor activities is hypothermia.
You can get hypothermia at seventy degrees. If you are wet at seventy, you’re not going to be able to maintain your body heat. If you are wet at seventy in the shade and the sun is about to set, you will also struggle. Keep in mind that very young children or older people can’t sustain their body heat at some of these temperatures if they don’t have the appropriate clothing. In those cases, hypothermia is a real threat.
Rules of three.
You can survive three minutes without oxygen, three days without water, and three weeks without food. There’s a little bit of a variable in that equation, but it’s pretty accurate. In three days you’re going to be suffering from massive dehydration and your body’s going to start shutting down. In three minutes you’re going to suffer from oxygen deprivation and brain damage can begin.
How a 9-1-1 search can start.
Generally, if you are lost you’re going to be rescued within two or three days. And if people know where you are, you’re probably going to be found in twenty-four hours. But, let’s say it’s three-thirty in the afternoon, and your kid goes for a walk and gets lost. You don’t realize your child is missing until five-thirty when Mom’s calling everyone to the campsite for dinner. It may take awhile to discover a child is missing. There may be calling and searching before you realize your child is lost and you call 9-1-1.
By the time rescue personnel arrive and gather the facts, it may be dusk. Depending on weather conditions, they might wait until morning to search. One of the dangers rescue teams have is the risk of walking over uneven terrain at night. It turns into the rescuer needing rescuing. Many times when someone is lost, they won’t be found until the following day because of darkness, so the more prepared they are, the better chance they’ll survive.
Stay dry. I mean it.
If you are conscious and dry and warm, then you’ll be fine. You can live without food and water overnight. You may feel cold, but you’ll survive. The key is to remain dry.
What if it rains? Either huddle under the canopy of a large tree or gauge what direction the wind and rain is landing and put yourself in a situation where you can remain as dry as possible.
If you get wet in a rainstorm, use the rays of the sun when it reappears to
allow your clothing to dry.
Example of wet clothing in cooler temperatures.
When your clothing is wet, your body loses heat very quickly. The cotton T-shirt or hoodie you are wearing is useless, because the water conducts the heat away from your body, and cools you off. So now all of a sudden, its say seventy degrees, but your body can’t maintain that temperature because of the heat being lost.
Your body maintains a temperature of about ninety-eight degree. Let’s say the air’s seventy, and your body’s producing energy so maybe it’s seventy. But, once you are wet you’re not okay. It is now dark and you have to spend the night in a place where you don’t have a way to dry off. When wet you lose more energy than you’re creating; this is when hypothermia could begin to kick in. People think that would never happen to me, but unfortunately hypothermia is one of the big outdoor killers.
Hypothermia defined.
Your body needs to keep organs at your normal body temperature. If your body is losing heat, the first thing to happen is your extremities cool off. Your fingers and toes get cold; as long as you don’t develop frostbite or the digits don’t freeze, then not a huge deal. It’s not uncommon for your skin to reach fifty degrees.
But, eventually you lose so much heat that your body starts to get cold inside. Your organs are not comfortable with being at those temperatures. So, in protection mode, your body begins to reduce the amount of blood flow to the skin. One way your body saves heat is to tighten your capillaries. But, your internal organs—liver, lungs, heart, they are all starting to get colder and eventually shut down. Next, your mental capacity goes down as well which is why people may start hallucinating. In advanced stages of hypothermia, they may stop talking or may not be able to communicate any more. At that point you have a serious medical condition. The only way to fix it is to warm the person up.
How quickly does hypothermia set in?
If you are lost and wet and can’t maintain your body temperature; hypothermia will set in. If you are a young child or an older person, it is more critical. The colder the air is the quicker hypothermia starts.
For example, say you fall into the Bering Sea which is about thirty-two degrees; you have about two minutes before hypothermia sets in. Or say you tumble into a seventy degree lake, you have about three hours. The basic concept is if you don’t warm up, you’re going to die.
Let’s say you aren’t wet. Or you are wet but the temperatures aren’t extreme, you are in for a long night. Hypothermia might not set in, but it will be a miserable night. It would also be a reason for someone never to go camping again. So, it’s more than just keeping track of your kids; its preparing them because things can happen. But, there’s hope. Read on for tips to prevent hypothermia and getting lost.
Simple things we can do for safety.
Help the people in your group understand where they are and how to return to the camp site. Also, train them in what to do if they become lost. If they don’t have equipment or proper waterproof clothing, there are still a number of things they can do.
Remind them to stay dry and warm, and make sure they know why this is important. Another thing is don’t move around after nightfall without illumination as it is easy to fall and injure yourself. Next thing you know you’ll be lost and hurt. It’s best to sit down after dark sets in.
You can also teach the people in your group about the terrain. If you’re camping halfway up a mountain, give them a landmark they can go to, that way you’ll know where to find them if they are lost. For example our place in the mountains has two peaks; one is on our property and the other on the neighbors. Everyone knows if they are lost to walk uphill until they can’t go anymore, that is where we can easily find them if darkness sets in and they don’t return to camp. Think about whether there are terrain features you can give simple directions around, so even a child can understand how to get to a place where it’s easy to find them.
Example: not lost, just hurt.
Let’s say you are out hiking alone, and you fall. You’ve broken something and you can’t make it back to camp. No one can hear you yelling and darkness is settling in. If you’ve left camp prepared, then you can rough it for a night with the pack I’m about to tell you about.
Equipment everyone needs.
Knowledge is power, but when camping, proper equipment can rule the day. If everyone is prepared with a pack when they leave the camp, that one simple thing can help prevent bad situations.
One item everyone should have is a waterproof jacket. The best kind is one with breathable fabric, for example Gore-Tex, but there are other good ones. If it is warm and you don’t need a jacket, tie it around your waist or stick it in your pack so you are prepared.
Of course, you should have water with you and some type of food, perhaps a Cliff bar or trail mix. It’s also smart to have a flashlight. If it’s going to be less than eighty overnight, bring a hoodie with you.
It’s really nice if you have a piece of plastic you can use to make a shelter. It’s also wise to have a way to create or build a fire. Both those aren’t necessarily essential.
Those are the basic things to put in your pack. Now you’ve filled up a small backpack. But, keep in mind many backpacking backpacks have a removable top section where you can store these items, so when you go for a side hike, you drop your bag and take these other things with you and you’re good to go.
Don’t panic.
If someone does get lost, the first thing they should do is sit down, take a deep breath and think about where they are and where they’ve been. It may be that if you can keep from panicking, there is a simple solution to return to camp without a lot of difficulty. If you’re panicked, you might be fifty feet from where you need to be; but you head off in the wrong direction and two miles later you’re farther away from where you need to be. Things like roads and rivers and unique trees or bushes are all solid landmarks to help people find their way back to camp.
Don’t rely on electronics.
Any electronics or something with batteries eventually dies. If you give someone a handheld GPS receiver or a compass and a map, they can probably find their way back, assuming they have the skills. A GPS is handy, but the batteries on a map and compass never die. Knowledge weighs nothing. Being able to find your way with a topological map and compass is a guaranteed way to know your way home. You can receive basic orienteering skills in an afternoon, time well spent.
With a GPS, you can set up a waypoint and use the GPS on your phone. Then you can compare the point where you’re camping to what your phone says, or the handheld GPS receiver, and make your way back to camp.
You still need to have the ability to survive on your own without technology, because batteries can die, or maybe you lose your signal. GPS signals can be hard to find in the mountains with trees or in a heavily forested area, even. So, it’s important to keep in mind that the phone is a wonderful thing, but there are a lot of places where it might not work.
A non-cellular GPS can have issues because of trees and terrain as well. GPS can fail for a lot of reasons. That’s why it’s so important to have self-reliant skills in case the batteries die or there is no signal. Your kids may look at you funny when you ask them to take a handheld GPS receiver, but it might save their life if they have to spend the night somewhere.
How prepared do you need to be?
Now this goes back to where are you in your camping experience. If you have a one-year-old and you’re not going to leave the campsite, then you probably don’t need to spend two hundred dollars on a waterproof jacket for everybody.
I’m a big believer in preparedness, so I’m probably a little more prepared than most. But if this is your first trip, with people and help nearby, then keep it inexpensive. Take some sweatshirts, take whatever gear you’ve got, maybe an umbrella, and keep it simple and economical. Don’t have a thousand dollar credit card bill. And don’t go in debt to go camping. Just have what you need if you get lost.
On the other hand, if you’re going to the middle of Wyoming and you’ll be a hundred miles away from the nearest help, that’s a totally different trip and you need to be prepared.
Many lost individuals are found very close to camp. Some have died from hypothermia, as close as ¼ mile from safety. So always be aware of your surroundings and how to find your way home. Do use proximity to others and safety as an excuse for not being prepared.
In general, what to wear.
Because it gets cool in the evenings, carry a hoodie for everyone. Depending on weather, bring a rain coat or umbrella. Also, since you’ll be outside all day, wear sunscreen or a hat, your skin isn’t used to having sun beating on it all day.
Now I don’t have any hair so I have to wear a hat. On the other hand, my wife has a lot of hair but she normally wears a hat. Another item to think about is sunglasses; they can keep the sun out of your eyes.
Wear comfortable clothing, shorts during warmer weather. Consider whether you might come across poison ivy. If you are allergic to poison ivy, bring an EpiPen. Bring anti-itch cream. Depending on where you are, you may want to add bug repellent as well. These are basic things to make you more comfortable.
You need to have rugged footwear, unless the plan is to exit the car and set up camp and not leave, then you don’t need to invest in expensive boots.
Have fun.
The goal is to keep everybody warm and dry sitting around the campfire. That makes for happy campers and you’ll have those wonderful moments. Keep track of everyone in your group and help them understand what to do if they do get lost so they’re crystal clear of what to do. Train your campers!
Check out my books on camping
Even the best sleeping bag will have fairly limited usefulness without support. Given that, let’s talk about the broader topic which is your sleeping system.
Your sleeping system.
A sleeping system is made up of four elements. The first is the tent, which prevents rain and snow off of you. But, it also keeps wind away. When you’re outside and the wind is blowing, you feel colder. So, a tent keeps cold air at bay and traps static air in the tent. The ventilation a tent provides is also important in hot, humid weather. We’ll talk about types of tents in a later chapter. Hammock tents, commonly referred to as Enos, are another popular option. However they are nice for solo trips and require trees the right distance apart. Hammock tents are best for more advanced campers, not a family trip.
Your sleeping bag.
The second element in the sleeping system is either a sleeping bag or sheets and blankets. A sleeping bag keeps you warm by creating tens of thousands of small pockets of air. There are a variety technologies for doing that—down, Hollofil, Quallofil, or a simple polyester fill. Keep in mind these options come in different price points.
Sleeping Bag Temperature Ratings
The temperature rating on a sleeping bag is the lowest outside temperature where you are still comfortable. The rating assumes you have an insulated pad under the sleeping bag and are sleeping in long underwear. This also won’t account for the cooling effects of wind chill , but your tent protects you from the wind. It is very important to keep in mind that some people sleep warmer than others and the temperature ratings of sleeping bags vary from manufacturer to manufacturer.
A ten degree bag will be very warm in the summer, while a fifty degree bag will be very cold on a thirty-five degree night. One way to extend the temperature range of your bag is to use a sleeping bag liner. A liner is good for approximately ten additional degrees of warmth. You can also use the liner by itself when it is really warm out.
However, for your first trip you may want to consider sheets and blankets on an air bed instead of buying sleeping bags. Another option is to borrow sleeping bags from friends or family. You may also be able to find used camping equipment. You can wash a used sleeping bag before you take it camping.
The down option.
You pay for quality and technology in a sleeping bag. The technology used is often designed to keep you somewhat warm, even if the sleeping bag gets wet. For example, a down bag is compact, lightweight, and tends to be warm. That makes it the perfect option for backpacking; but when wet, a down bag is pretty close to useless. The key is to keep it dry while it is in your pack and when it is spread out in the tent. The need to keep a down bag dry and the additional cost are reasons to avoid a down bag for your first trip. If you’re embarking on your first trip and you plan to car camp, it may be wise to start with blankets and comforters that you have at home. That way you’ve lowered your initial investment. Once you enjoy your first camping trip, you can consider purchasing additional pieces for future endeavors.
The Quallofil, Hollofil filled bags.
Bags that are designed to keep you warm even if they get wet are Quallofil or Hollofil filled. They are made up of a variety of fibers that have different ways of maintaining a space of trapped air. Sometimes those fibers are hollow and there may be other strategies; but the idea here is even if that sleeping bag gets somewhat wet, you’re going to keep some of the warmth, which could be a lifesaver in a difficult situation. Also, either of these bags will dry quicker than down.
The polyester option.
When we think about family camping, the least expensive option, polyester filled bag, comes to mind. These bags are inexpensive but have a limited temperature range. You’ll want to make sure your bag is rated to a temperature at least 10 degrees below the lowest temperature you expect to see at that location. Polyester filled bags don’t stay warm if they get wet but their low cost can make them an attractive option for your first car camping trip. Instead of an inexpensive sleeping bag, consider saving more money and bring sheets and blankets from home.
Two-person sleeping bag.
Another option is a two-person sleeping bag. You can purchase them at Bass Pro shops or other sporting goods stores. Often the two-person bags are very warm and comfortable. There are rectangular one-person bags that can be zipped together to form a two-person sleeping bag. We’ve got a couple of those. And those are awesome. You know, they’re covered with duck cloth on one side and flannel cotton lining on the inside. They’ve got a lot of fill material. And they’re really warm. I think we spent eighty bucks each at Bass Pro Shops. Though, I would never take that backpacking because it’s monstrous and heavy. But, for car camping where I really don’t have a weight and space constraint, it’s really comfortable because you get in that sleeping bag and it’s soft and warm. That sleeping bag is keeping you warm by trapping small pockets of air around your body. Those pockets of air act as insulators.

Add a pad under the sleeping bag.
The third part of your sleeping system is an insulated pad. The pad underneath your sleeping bag is a necessity. Keep in mind you don’t have to go out and buy everyone a three hundred dollar bag just to go camping for the weekend. Don’t think of the sleeping bag as a completed product, think about the system you’re using to sleep with. For example, a simple system for backpacking would be a sleeping bag, a tent, and a pad underneath you. The pad is used for thermal insulation, comfort, and keeps you from getting cold. Your body weight compresses your sleeping bag, which loses the effectiveness of the insulation. So, if you don’t have a pad underneath the sleeping bag, you’re going to be very cold. The concept is that air will be trapped above you but not below, therefore precious heat is lost into the ground.
Pads available.
There are several different pads available at various price points. You can choose either foam, self-inflating, or an inflatable pad. A self-inflating pad actually inflates on its own when you roll it out whereas you have to blow up an inflatable pad. I’ve used the inflatable and foam, and they both work great. The difference with both types of inflatable is that when not in use they flatten down and are small and lightweight.
The inflatable pads and beds are really awesome as long as there’s no leak. The risk with a leak is then you are sleeping on the ground. You may be able to temporarily patch an inflatable pad, if you can find the puncture. If the leak is occurring in the area where the pump attaches, then it may not be possible to repair the inflatable pad or bed. It’s difficult to patch an inflatable pad in the best of circumstances. If the patch mostly holds then you may get part of a night of sleep before the pad or bed deflates and you are sleeping directly on the ground. Foam pads, as opposed to inflatable, don’t fail, are fairly inexpensive, and last a long time. Though they take the most space of all three, they can get wet and still get the job done. Don’t forget that with car camping you can use heavier and more bulky items that tend to cost less and last longer because you only need to lug them from the car to your campsite. On the flip side, if you are hiking several miles into the woods, you would want to go with one of the inflating pads as they are significantly lighter and much less bulky.
If the weather is warm, perhaps fifty degrees or higher, you probably won’t need a pad under your air mattress. However, the foam pad is a great backup in case your air mattress leaks or for some reason you aren’t able to pump it up.
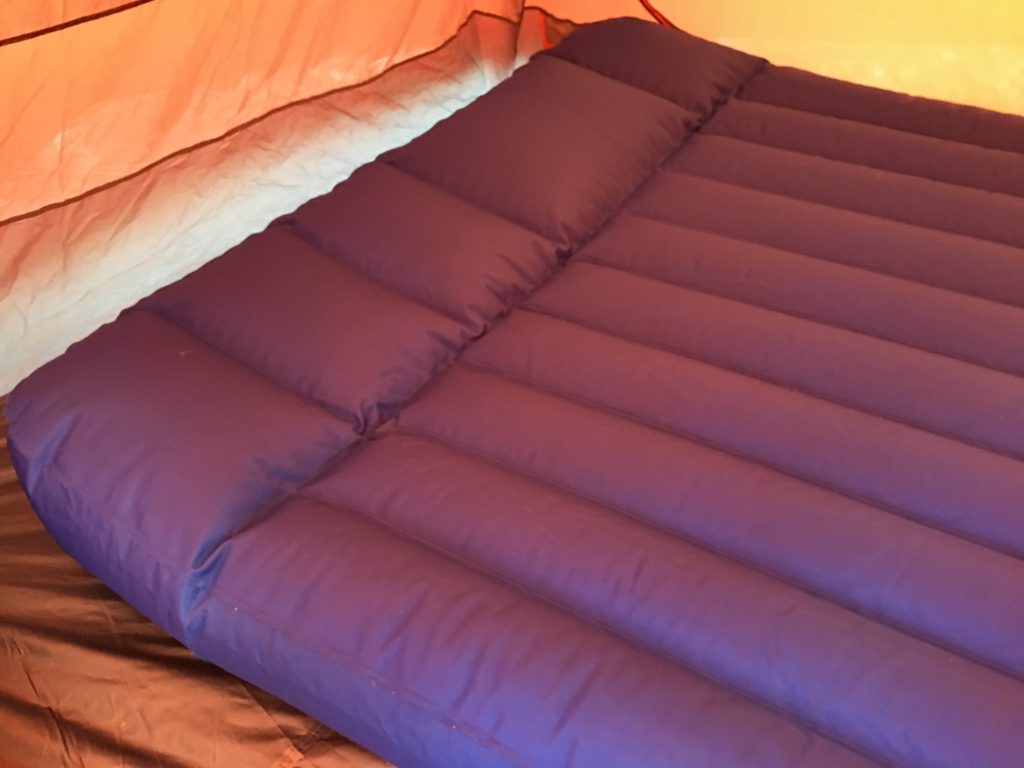
Possibly add an air-mattress under your sleeping bag.
The fourth and final part of your sleep system is to add an air mattress between the pad and the sleeping bag. You will still need a pad if it is cold to retain heat. If you are backpacking, you wouldn’t take an air mattress. If you are car camping, the air mattress makes your sleeping experience in the tent much more comfortable.
Another neat thing about an air mattress is that it can do double duty. If you invest in one for camping, you can still use it in your home for company. When camping without electricity, you’ll need to invest in a D-cell battery pump, or a pump that runs off the cigarette lighter in your car, to inflate up the mattress. You can also use a hand pump, which is less expensive, it just takes longer to inflate. I will say check your air mattress before you leave home because if it has a leak, you have a problem. And usually you’ll have to pump them up every day and a half or so while camping. Keep in mind that the older you get, the more you might appreciate the feel of an air-mattress. It will keep you a foot off the ground and allow you to get up and down easier. So we age, an air-mattress may be a way to extend your ability to camp longer throughout your life.
The air mattress, or inflatable bed, is inexpensive and come in sizes as large as queen. Since you are car camping for your first trip, the size of the bed when it’s packed up isn’t usually a big issue. Make sure that your an inflatable bed actually fits in your tent before you get to the campsite. I know I keep mentioning this, but setting up your tent and air mattress at home, before you leave to go camping, is always a great idea.
One caution I have for you is to carefully explain to everyone to not plop down on an air-mattress. If that air mattress fails it’s going to be a long night sleeping on the ground which is pretty hard.
How an air-mattress can feel like home.
We have a queen-size air-mattress, a single rectangular sleeping bag, and two single bags that are very large. Given those tools, my wife will lay a bedspread or a blanket on top of the blown-up air-mattress and then a fitted sheet over that. Then, Connie will put a regular sheet over that and lay the single rectangular sleeping bag on top. Finally, she’ll zip the two single bags onto the square one on the bottom—creating a roomy homemade double sleeping bag. This setup is very comfy and warm and feels more like the bed at home than a slick sleeping bag on a backpacking pad. This homey feeling makes the sleeping part of camping more comfortable and more like the bed at home. This is a win for everyone because a good night’s sleep helps make for a good next day.
For your first camping trip, you can make it simple and place a double sleeping bag on top of the air-mattress and call it a day. Of course, you can also do this with a blanket or a comforter, and then there is no need for a sleeping bag. Be cautious with using comforters from the home because many times they are dry-clean only or too large to fit in your in-home washing machine when they get muddy or dirty. On the other hand, sleeping bags and blankets can go through the wash with no worry. Note that down bags require a special soap and drying method to keep their loft. It’s not hard, you just need to follow the instructions. You also want to minimize the number of times you wash your sleeping bag.
Still use a pad if you have an air mattress.
The air mattress has you up off the ground and provides some insulation, but it’s this giant pocket of air, so it’s not as effective as a pad, which contains lot of small pockets. That big air mattress has limited insulation and can allow you to feel the cold ground below. So, when the weather is cold, make sure to include an insulated pad between the mattress and the ground. This will help keep you warm. Depending on the size of the air mattress you may need to put two insulated pads side by side.
Recap of sleeping system.
So that gives you a system, possibly for a low cost. Your linen closet contained the blankets, comforters, and sheets, if you choose not to purchase sleeping bags. You may have already owned an air mattress or can borrow one from a friend or neighbor. Now, at minimal cost, you’re prepared to go camping. And you’re extremely comfortable. By doing this, you can get an idea if your family enjoys camping. If they do, then you can begin to invest in more products to keep yourself warm and comfortable.
Planning can make all the difference in attitude.
If you follow my steps and plan for a quality tent that won’t leak, a pad to keep the cold and wet from your bedding, an air-mattress for comfort, and warm coverings to snuggle under—whether it be a sleeping bag or blankets and comforters—everyone at the campsite will be warm and comfortable. The system will feel much like their bed at home. Everyone will get a good night’s sleep because you’ve created this amazingly satisfying environment to sleep in that is similar to their bed at home.
The first night.
For me, a lot of times I don’t sleep well the first night because I’m out of my normal element. But there’s a big difference in levels of not sleeping well. For example, if I’m laying on the ground on a pad in a mummy bag, I’m probably going to, that first night, sleep less than if I’m snuggled up to my wife on an air mattress, all warm and everything’s wonderful. It’s a lot easier on that big, thick air mattress to get a better night’s sleep that first night.
Subsequent nights.
Usually, the second night I sleep pretty good, it’s the first night that gets me. I think that means I’m mentally and emotionally in a better position the next day to be friendly and loving and kind, and not grumpy because I didn’t get enough sleep. Given this, don’t feel like that there’s anything wrong with bringing the comforts of home with you.
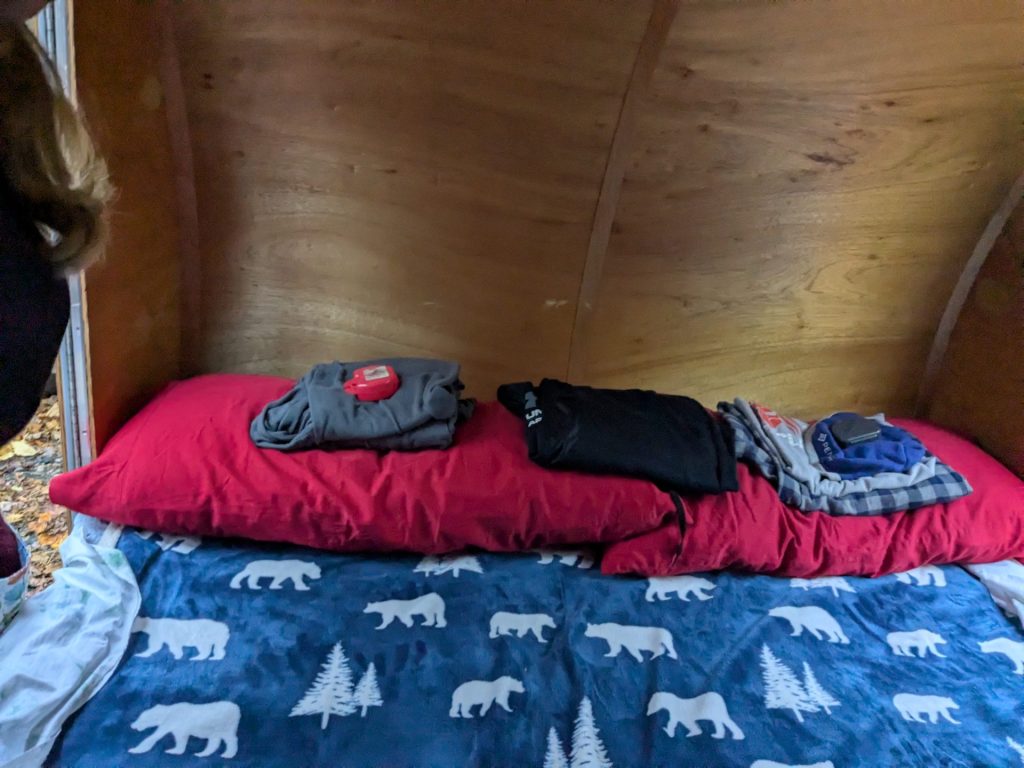
Encouragement.
The big thing is that I want to encourage y’all to get out and enjoy the outdoors. By all means, if you’ve got to do a little more “glamping”, or glamorous camping, than just playing camping that’s just fine. It’s all a process. Each trip puts you one step closer to having the skills you need for the next level. It also puts you one step closer to say a backpacking trip, or some more adventurous type camping. Or maybe you stay in the glamping stage forever, that’s fine as well.
After the Camping Trip
I only wash a sleeping bag when I have to. If it’s muddy or dirty or smells, it needs to be washed. I ALWAYS air out sleeping bags well after a trip. I have a rail above the stairs that allows me to leave the sleeping bag open while hanging over the rail. You can also just leave them open on the floor or on your bed. Make sure your sleeping bags are dry and clean before storing. If you let it mildew, it is very difficult to get that odor out. Don’t roll up your sleeping bag tightly for storage, or put it in a compression sack, instead store in a dust free environment or loosely in a bag. That will help prevent the sleeping bag from losing its loft, and the warmth the loft helps create.
Can I say…
You are on your way to developing a love of the outdoors, along with the skills and sense of freedom necessary for camping. If you want to push yourself with each trip, go for it! Otherwise, enjoy the outdoors in whatever set-up works for you and your family.
These tips on the sleeping system are great ways to keep everyone comfortable and give them a good night’s sleep. I think that helps the overall camping experience. So, get on out there and enjoy the outdoors while camping.
Check out my books on camping
Let’s tackle where to go camping and what to do when you get there.
Picking a campsite.
If you choose a campsite at ten thousand feet overlooking half the state, well, that’s awesome. But there’s probably not a lot to do up there unless you’re into epic hiking or rock climbing or bouldering. If your family’s not, or you have young kids, you will not meet with success. If you want views and relaxation, then this is the place for you. But, if you want to be near water you’re probably going to be closer to the valley.
One of the advantages of a campground is that other people are around and they may have amenities. There might be a game room with a pool table or a foosball table or air hockey table. There might be a lake with canoes and a place you can fish. Also, there are usually other people around so your kids may be able to find someone to play and have fun with. A place like Bear Den Campground, in Spruce Pine North Carolina, is a good example.
Another campground choice is to camp near where you want to explore. For example, Asheville has the Biltmore Estate and art galleries and loads of shopping. Perhaps that’s part of the camping experience. You camp where you can be close enough to Asheville. Say you have lunch in downtown Biltmore, then walk through a bunch of art galleries. That makes everybody in your family happy. In the afternoon, you go back and sit by the campfire. Another day you may have a totally different experience where you spend a day at Sliding Rock. And the next day you hike waterfalls on Mills River, or you hike up some mountain, or visit the Carl Sandberg home or Moses Cone estate. The list is endless. And all these activities are within a thirty-minute drive of the campsite you chose.
Now the downside to a campground is that you’ve got other people around, which means you’re not going to have that “I’m alone and there’s no one within fifty miles of me” experience. The flipside is the higher the concentration of people, the more there is to do. I recommend checking what’s available in that national forest or that campground or that state forest, and then check what there is to do in the neighboring towns. Usually if there is tourism, there are other things to do besides camping.
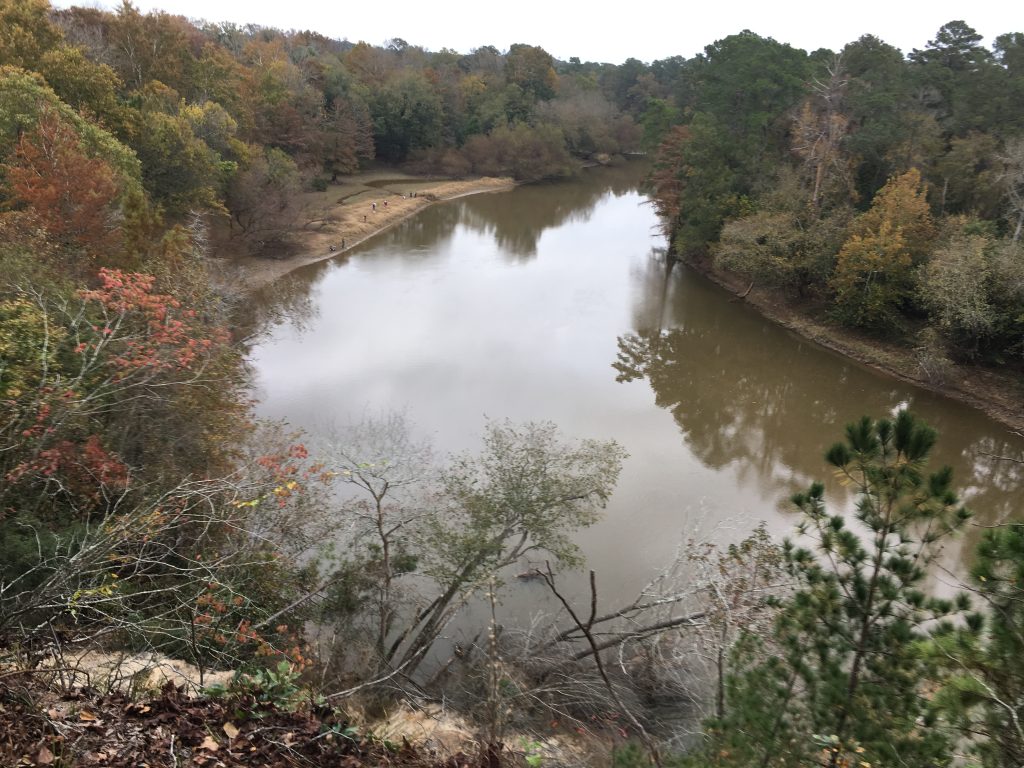
Check reviews. Make a plan.
I recommend choosing your campsite based on the activities you want to do and the places you want to go. Also, always check reviews and look for a variety of activities. Another idea is to get in the car and drive around. It all depends on whether you like to plan and schedule ahead of time or figure it out as you go.
Some historical sites can be fun for even young children. For example, Moses Cones Manor, off the Blue Ridge Parkway, has several thousand acres with gorgeous views, a lake, and paths. That’s a nice choice for young and old!
Everywhere you go is different. Some hikes that have spectacular views may be hard to get to, so you have to ask yourself is it worth it. There are many shorter and moderate hikes that have equally amazing views, so investigate and ask around.
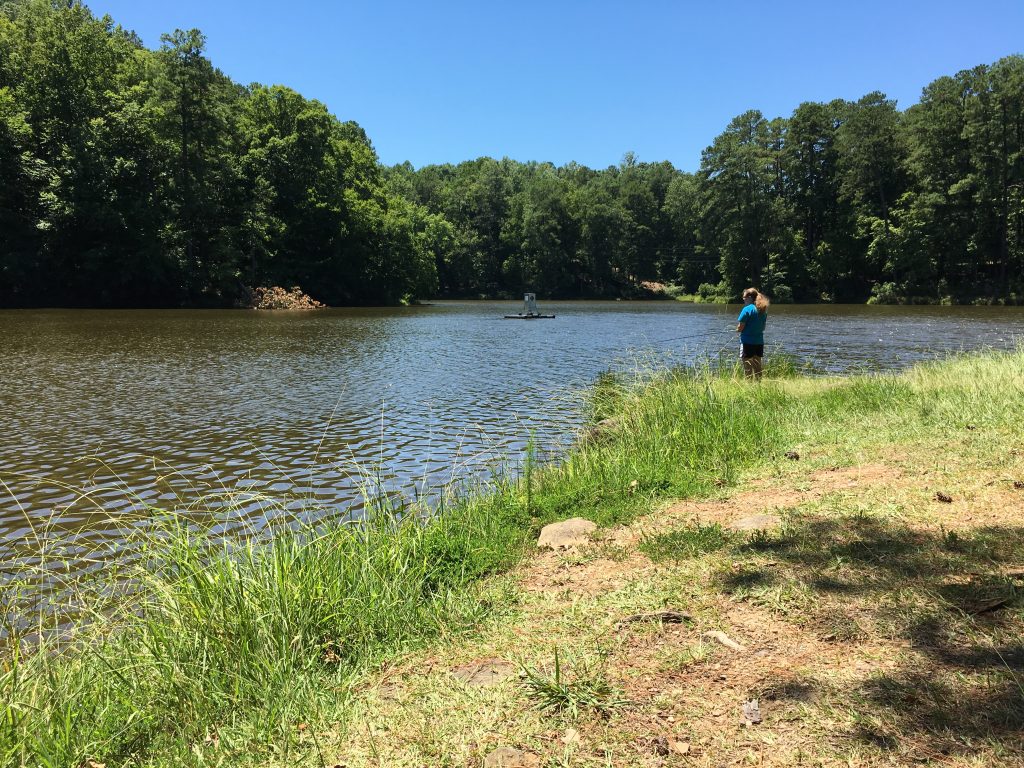
Need a fishing license?
When you think about fishing, you need to check on the fishing license in that state. In North Carolina you must have a license to fish anywhere other than private property. So, if you plan on fishing, check out the license issue ahead of time.
Non-active pursuits while camping.
A non-active experience is when you’re sitting around the campfire, reading a book, napping, or spending time on your smart phone. It could also be where you’ve camped on the top of the ridge at six thousand feet, and the sun is rising across the mountains, and it is the most gorgeous sunrise or sunset you’ve ever seen in your entire lifetime. This is something you can experience without leaving the comfort of your camping chair. Maybe even your tent, depending on which way your tent faces. Passive experiences aren’t bad, they are just different. There are times when non-active is the way to go.

Active options.
Hiking, rock climbing, horseback riding are options. Water options include: canoeing, paddle boating, fishing, rafting, or kayaking. Consider taking a lesson in rock climbing, horseback riding, kayaking, or rafting class. If you’re in Western North Carolina, slide down Sliding Rock—trust me it is so much fun! Another fun spot is The Historic Orchard at Altapass, which allows you to go apple picking, shop, eat ice cream, and sometimes they even have live music.
Depending on who is in your camping group, you may decide to go out to lunch, shop in the next town over, walk through an art gallery, a zoo, or museum. Consider your audience. The point of each trip is to have fun and have everyone want to go on another camping trip.
You might want to do a ropes course, where you’re fifty foot up in a tree, climbing. Keep in mind that it’s safe because that’s the only way these companies will be in business tomorrow. For example, the Nantahala Outdoor Center will teach you a short course on how to raft. And then they’ll put you on the river, and you can enjoy a more family-oriented day of rafting. If you want to go big water, go to the Gauley; it’s not for young kids but it’s awesome for adults.
Passive vs. active, own it!
I want to give you an example of my lovely wife. We can be in the most amazing spot and Connie is completely content sitting by the campfire in the afternoon, reading a book. And I’ll say, do you want to go for a hike? And she’ll look at me and say, no go ahead without me. She is completely content. We’ve been doing this camping thing awhile, so Connie knows what she likes. I’m not going to force her into something she doesn’t like. She enjoys the somewhat passive experience a lot of times when we go camping. So during our down-time when we could be hiking or biking or canoeing, she’d rather read. But when it comes to meals, we work as a team.
What is your stance on a smart phone while camping?
When your kids get to be teenagers, they may be tethered to their phone. Now, this is your fight to fight. But, camping is a great opportunity to set some new house rules. Use your judgment because if you completely take something away that they’re used to having, maybe they respond well to that, maybe they don’t. You don’t want anger and frustration to be the imprint of your camping weekend. You need to figure out what works for your family. It may be tough for someone to give up unless they really, really want to. I think that’s important to keep in mind. There are different ways to approach that. You could leave the phones at home. You could have them an hour a day. You could have a morning and evening time where phones can be used, but otherwise not at all. I really think it depends on the situation and how busy you’re going to be and where you are and what personalities you are dealing with.
Music venues on the cheap.
If you are near Marshall, North Carolina, every Friday night at the train depot they have music. Everybody’s doing covers for the most part, think Johnny Cash tunes. Mostly local people attend this community gathering and everybody has a great time singin’ and pickin’ and grinnin’. There is a small donation to get in. Kids will possibly hear music they don’t hear otherwise, and see a different culture that is totally different than what they’re used to.
Another good example of musical venues is Shindig on The Green in Asheville, every Saturday night. That’s you and a couple thousand of your closest friends on the grass at City County Plaza enjoying bluegrass music sitting in your camping chair. Many of these events are family-oriented, but do your research first. Check the venue, the type of music, use good judgment. A lot of these gatherings happen regularly and they are really cool. They are a great way to break up your camping experience.
Other “civilized” activities.
Maybe go listen to a few hours of music, or go to an arts and crafts festival. Get away from the campsite. Give everybody a little touch of home, so they feel “civilized” again. I think that’s important because you don’t want camping to become this horrendously intimidating epic-or-nothing type adventure. Instead ease into it so everyone has a positive experience. Make sure to only push the comfort zone so far, and that way everybody wants a return camping trip. Maybe the next time you push a little further.
Campfire rules.
Think about setting what I call “truck rules.” Guidelines that may not be acceptable in the home, but in a truck or camping, they are for your family. One example we have is that in a truck you can make bodily noises that wouldn’t be socially acceptable otherwise. It’s about letting go of some finer points of decorum so your kids don’t feel like their sitting in the dining room surrounded by china. This is the time to let everybody unwind a little bit.
You’ve got to figure out what’s appropriate for your family. I’m not suggesting that all of a sudden you allow your kids to call you by your first name. I’m saying, if a kid farts you laugh about it; you don’t fuss at him. If they spill beans on their lap, you laugh. And you don’t quit laughing. Because you’re making a precious moment; relish these times.
I’d also like to remind you not to overindulge in alcohol. First, you’re out in the woods and if someone gets hurt and no one can legally drive, there’s no way to get to the emergency room. Second is that you’re out in the woods and you need to keep your wits about you. If you’re going to drink, drink lightly and be smart.
Let kids be kids.
Camping is the perfect time to encourage kids to enjoy outdoor activities, not just organized ones, but impromptu fun. If they want to play in a creek, let them! Assuming they know how to swim and are aware of the dangers, keep an eye on them from a distance and allow them to be kids. This is a great opportunity to give them clear guidelines and begin to let go. If you’re on this gigantic place of open woodland, forest, desert, whatever, tell your kids the extent of where they can go, keep track of them. But let them go be kids. Sometimes they need that unstructured play.
Now, obviously, if you have a three-year-old and they want to play by the lake, you need to be there. You must keep an eye on young children, but if a ten-year-old wants some latitude, now’s the time to give it to them. Always use your judgment as a parent, but keep in mind they’ve probably never had the kind of freedom they are looking at during this camping trip. They will not get these opportunities in the city and maybe even in a lot of suburbs.
So, ask yourself what unstructured activities you can encourage your kids to partake in. Near water, or no? Climbing trees with thick, low branches? Fishing is always fun, but you can keep it simple by using a cane pole with natural bait. You don’t have to be a well-equipped fisherman to have a good time. Sometimes the simplest things are the better.
I have found that when you get equipment in the way, the equipment occupies your attention, not your kid. Be attention heavy to your kids, because when you get that brand-new five-hundred-dollar fly reel and you’re in four hundred-dollar waders, you’re worried about that stuff, not helping your kid cast that rod and reel.
Keep things in perspective.
I think perspective is important. Part of the reason I’m throwing these parenting ideas out there is because there are areas I’ve messed up. Sometimes I wonder if I should have given my little kids more freedom and less structure playing when we camped. I feel they would have enjoyed the experiences more. I hope you can learn from some of my missteps so that your camping trips are chock-filled with priceless moments.
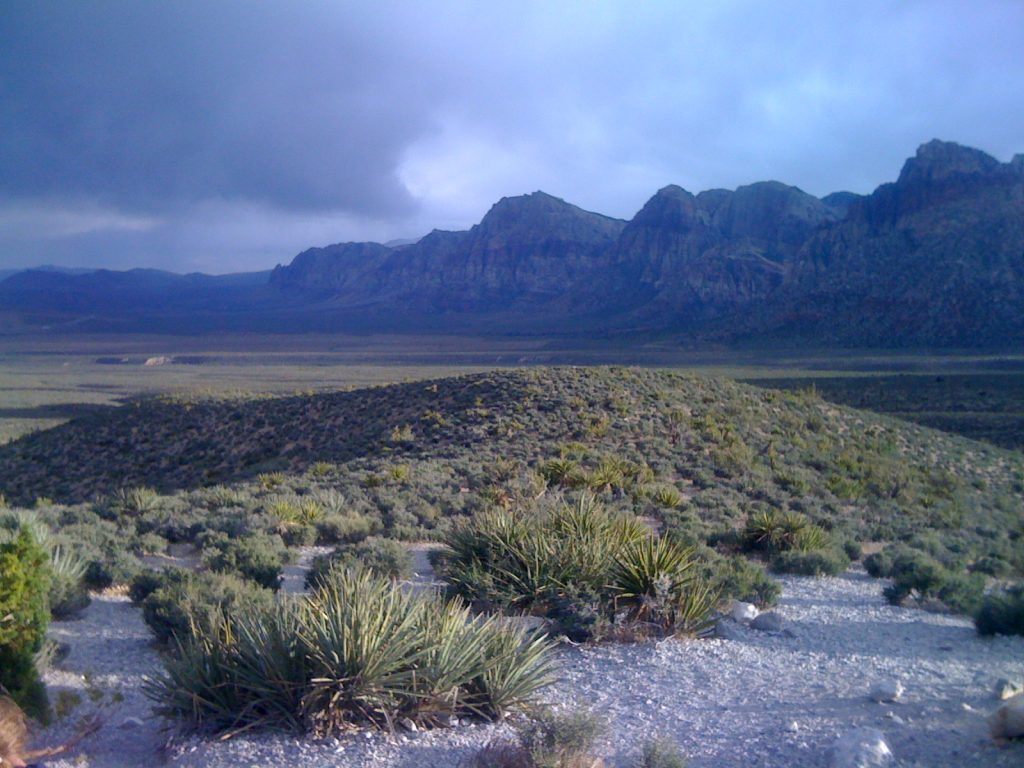
What will everyone remember?
Will it be the hike, or the view, or the campfire, or the messy S’mores? Perhaps it’ll be the game room or snack shop at the campground. Who knows, for twenty years they may talk about that game room and snack shop with their sister and the amazing ice cream they got their every year.
Everybody has a different take away from all these things and sometimes it’s tough to put yourself in other people’s shoes and understand what they will remember. Who knows, they might remember the time they saw a bear, and that might lead to them to study bears in college so they can be a forest ranger. Or it may just be a story they fondly talk about.
My recommendation is to try different things over the years. Personally I don’t like being cooped up in a car so I think the more time you can spend out of the car is probably good. If it takes two days to drive somewhere and you’re there for one day, and it takes two days to drive back, I don’t think you have a winning plan. If you really want to go to that location, consider flying. But you need to ask yourself what your comfort zone is.
Wonderful moments can be unscripted.
Some of the memories my kids have about camping are surprising. Some of them have been totally unscripted and wonderful moments that I didn’t even see coming, but, you know, the kids said let’s do this. So, we went and did whatever on a lark, and then, you know, an hour later, it’s like Wow!
A great example of a wow moment is a last minute hike. My daughter and I took a last minute hike and the view across this mountain top field with the fog rolling in was totally amazing. Words could never do the view justice so I won’t try. If we hadn’t gone, based on her suggestion, we would have missed out on an amazing moment. Other times I planned things well in advance that turned out great. It’s kind of tough to predict that ahead of time.
The trick is planning the trip and getting to the campsite. That’s where the winning occurs. You may have camping trips that are difficult. If it rains all weekend, consider playing cards in the tent, or go to the nearest town and go bowling or play laser tag.
Don’t feel like your plan is set in stone, roll with the punches. The point is to be together, have fun, and make memories. The tent could fall down and you think it’s a total disaster, but because you laugh about it and handle the situation with patience and calm, that is the good memory your kids take away from the trip. Who knows, they may talk about it for years to come! So remember, your attitude can make or break those precious moments.
Unscripted decisions can lead to fun!
On a funny note we were camping one time, and a thunderstorm started rolling in. We’d been hiking all day on Mount Mitchell, when we returned about three quarters of the people at our campground had already left. The people who were still there were packing furiously. Since we had been off-line all day, I asked why everyone was leaving and discovered the weathermen were predicting a thunderstorm worse than any they’ve had for a hundred years was going to hit in about four hours. We had already planned to be away that weekend, so we decided to stay and ride it out. Guess what, my daughters and I had a lot of good memories riding out Tropical Storm Bob in a tent. To this day we laugh about that weekend and carry sweet memories around it. We kept ourselves safe, we had a solid backup plan so there was no real danger. Bottom line, I think roll with the punches, enjoy it, plan out the activities and let’s go camping!
Every year we have guest bees on the property. The bees stay for approximately 6 weeks during the sourwood bloom. The flowers that are available to the bees on the mountain give our honey a distinctive taste. The bees are far enough from the campsite that you can see them but they aren’t an issue for anyone camping on the property. Many people have never seen a bee hive, so hopefully it can be an educational experience as well.
You can purchase honey from the bees from the SimplyUsFarm online store.
The honey from Troublesome Gap usuallly comes out very light in color. Two years ago it had a basswood taste. Just click on the picture below to order yours.